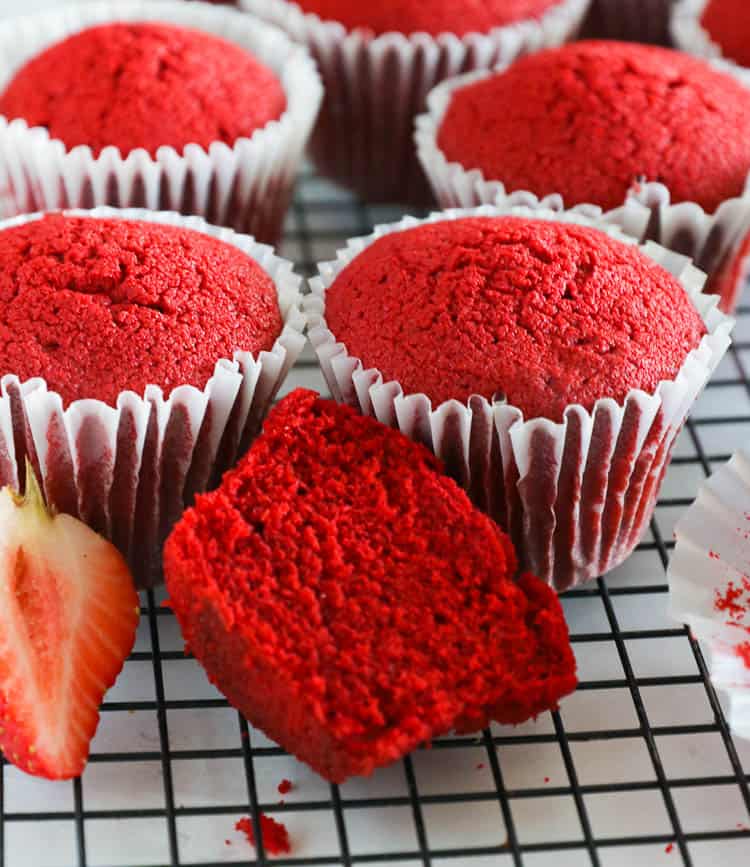
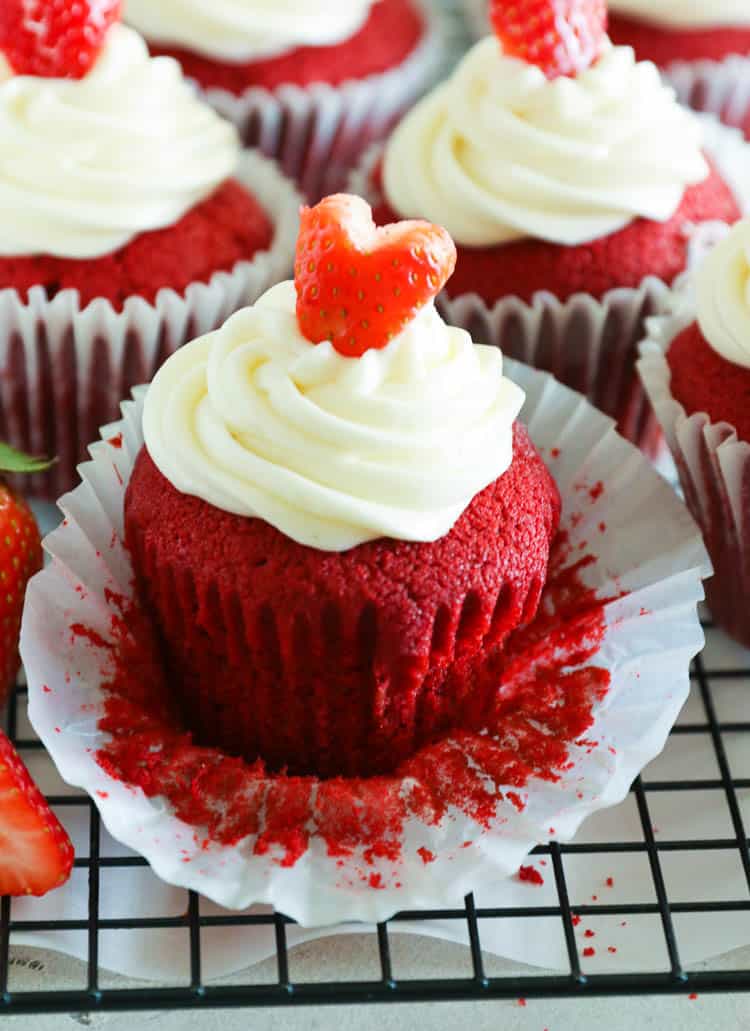
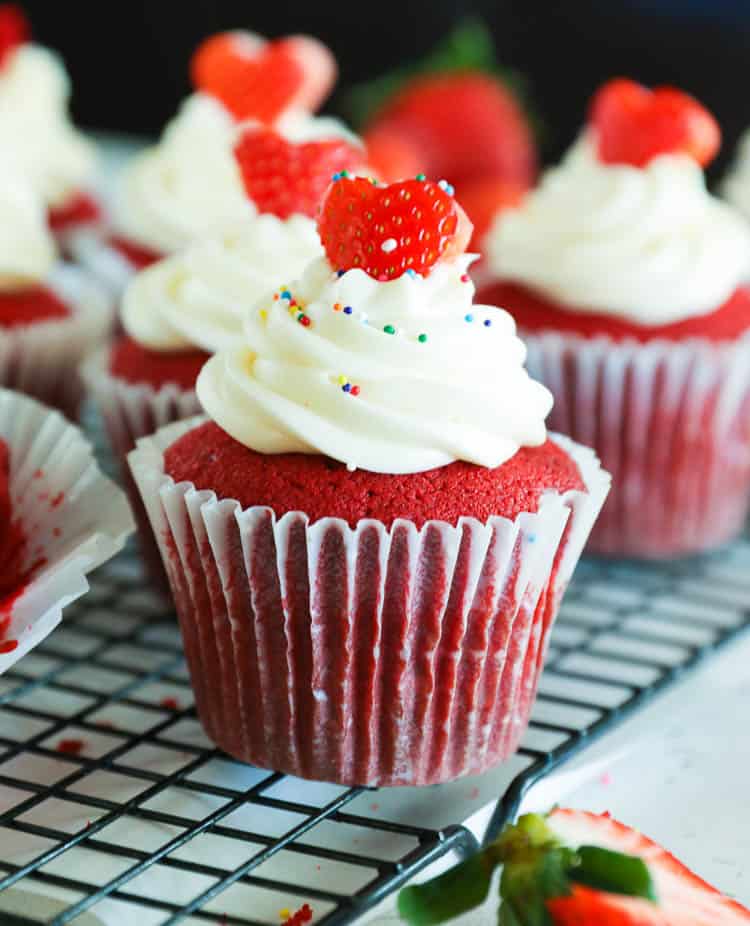
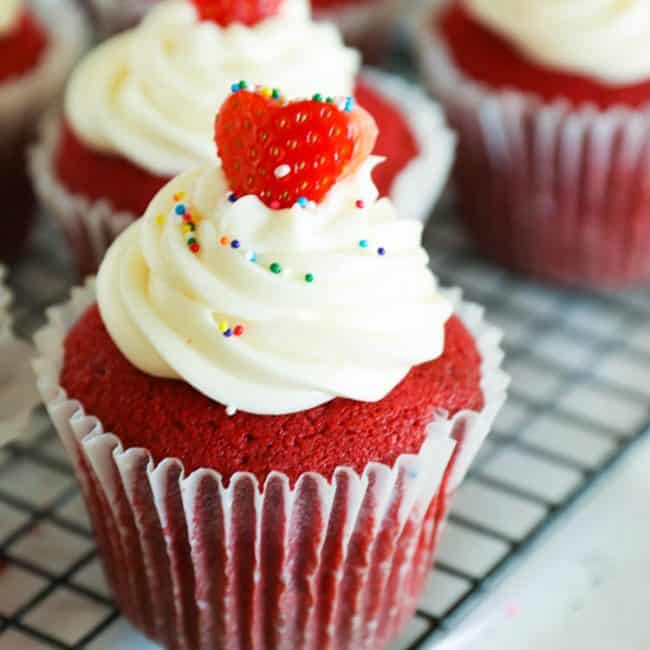
The Best Red Velvet Cupcakes
Every decadent bite of these moist, chocolately red velvet cupcakes, loaded up with a rich cream cheese frosting, will take you to heaven and back. The hand-held version of this traditional Southern dessert is a show-stopper, especially around the holidays.

Lately, I’ve been in a cupcake phase. It has been fun experimenting with turning my favorite cakes into cupcakes. Not only are cupcakes easier to take to a picnic, but the kids love having their own personal treat.
Besides, who doesn’t love getting a personalized red velvet cupcake on Valentine’s Day? And the holidays are all about the desserts, right? So these guys fit in perfectly.
What Makes Red Velvet Red
Way back when, the color was a reaction of the acid in buttermilk with the anthocyanins (big word referring to pigments) in the cocoa powder. Nowadays, beet root juice and artificial red coloring give this cake its iconic red.
How to Make Red Velvet Cupcakes
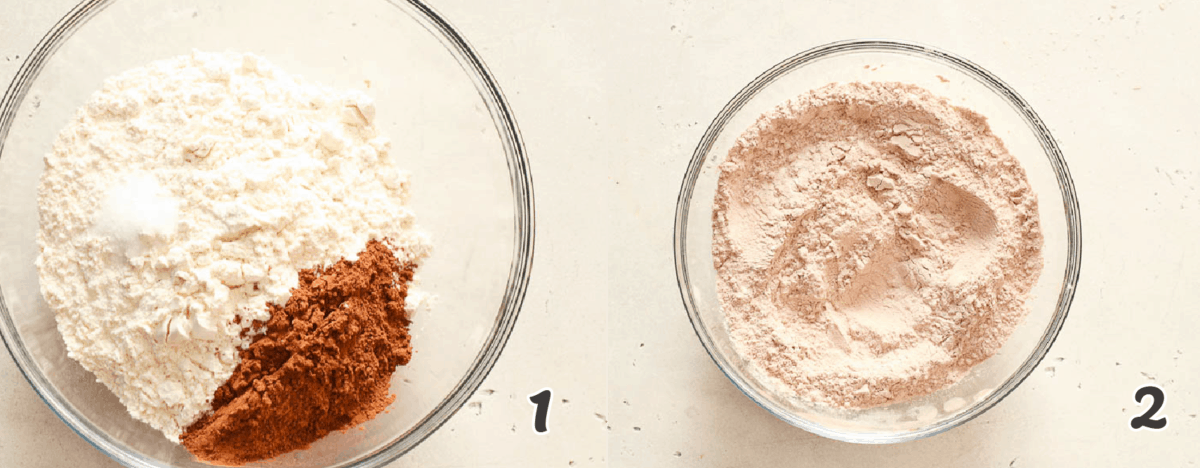
- Combine the flour, salt, and cocoa powder in a medium bowl, and set aside. (Photos 1-2)
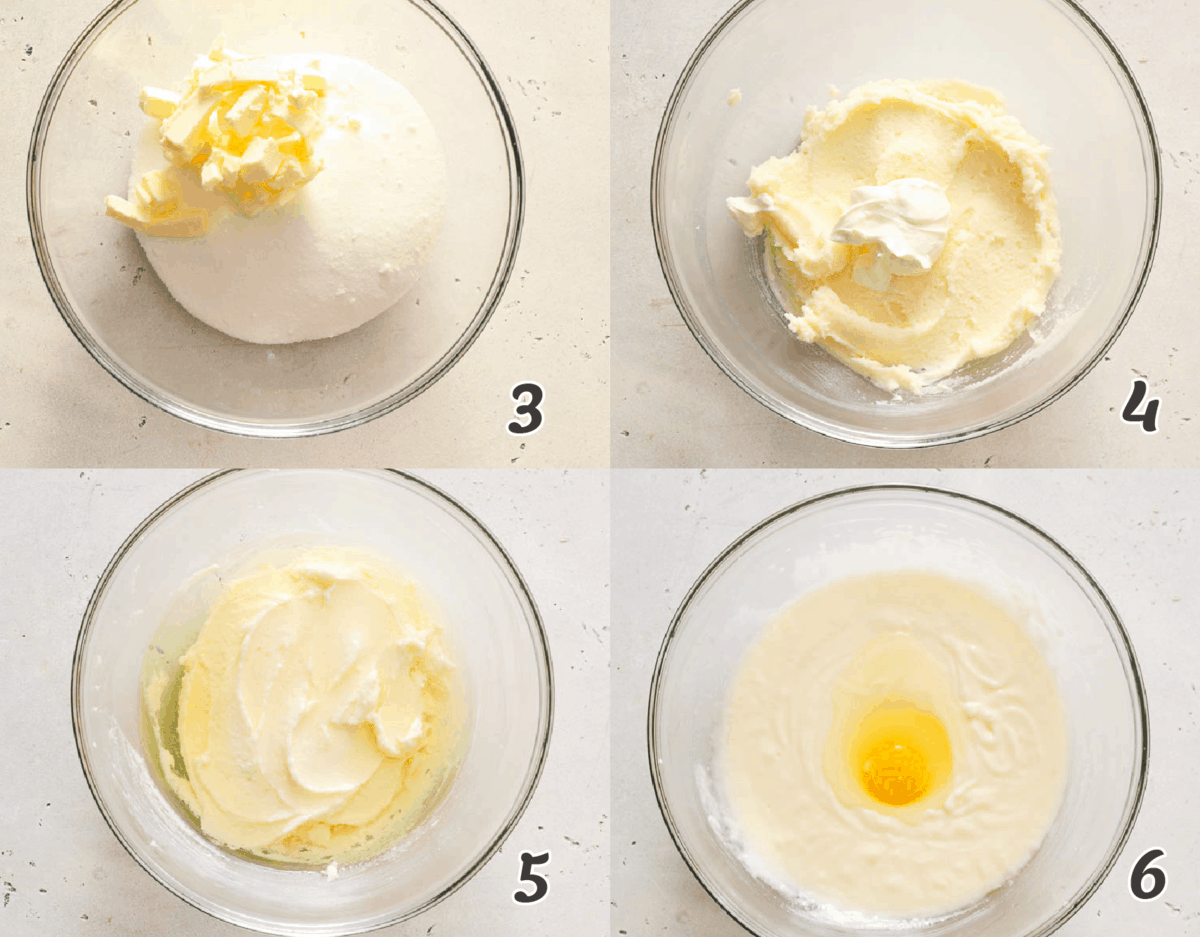
- Cream the butter and sugar at high speed in a stand mixer (or hand mixer) until fluffy and starting to look white, about 4 minutes. (Photo 3)
- Then mix in the sour cream for about a minute, and mix in the oil for another minute. (Photos 4-5)
- Add the eggs one at a time, beating the mixture well between each addition. (Photos 6-7)

- Pour in the buttermilk, vanilla extract, and vinegar, and mix thoroughly. (Photo 8)
- Add the red food coloring until the desired color has been reached. (Photos 9-10)
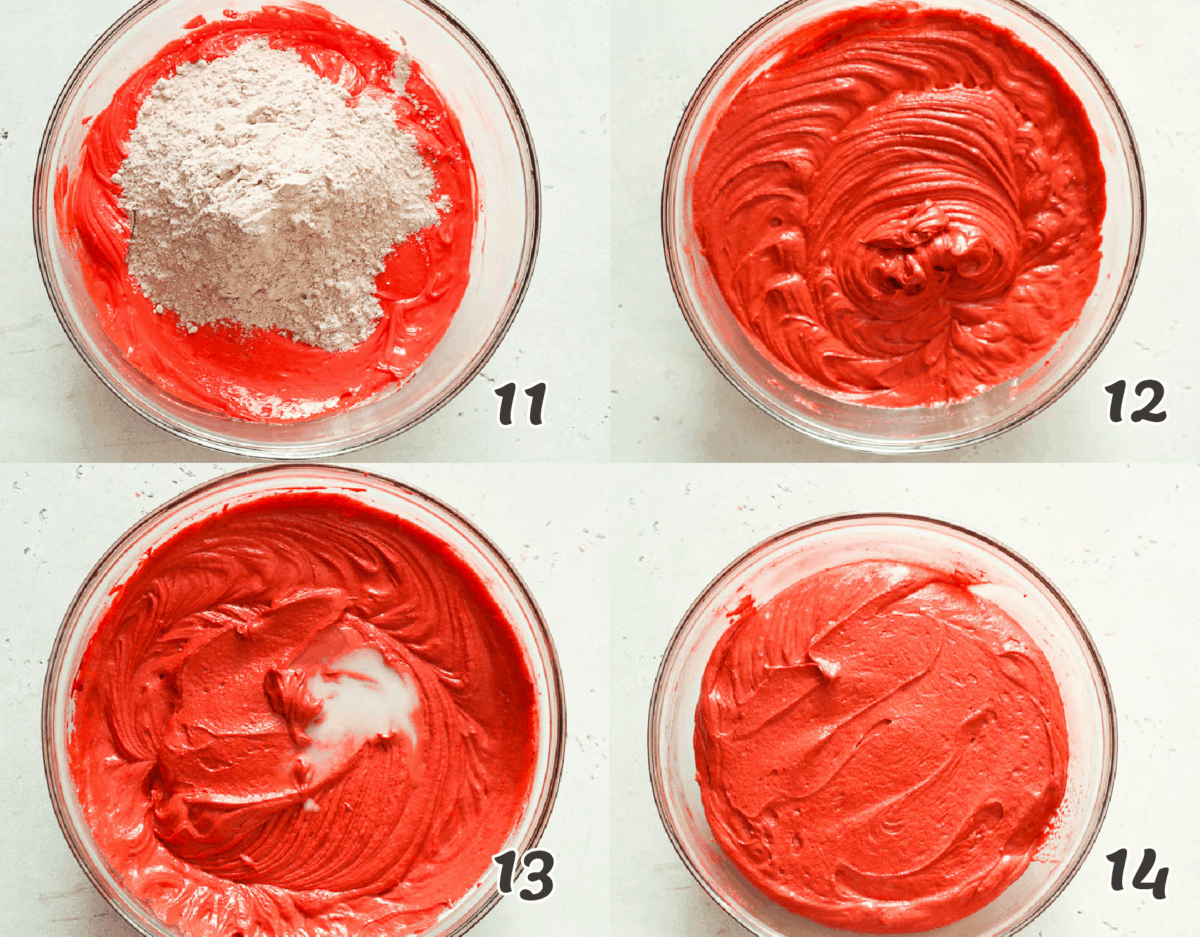
- Combine the dry ingredients with the wet. (Photos 11-12)
- Mix the baking soda and water and gently fold them into the cake batter, scraping down the sides of the bowl as you mix. (Photos 13-14)
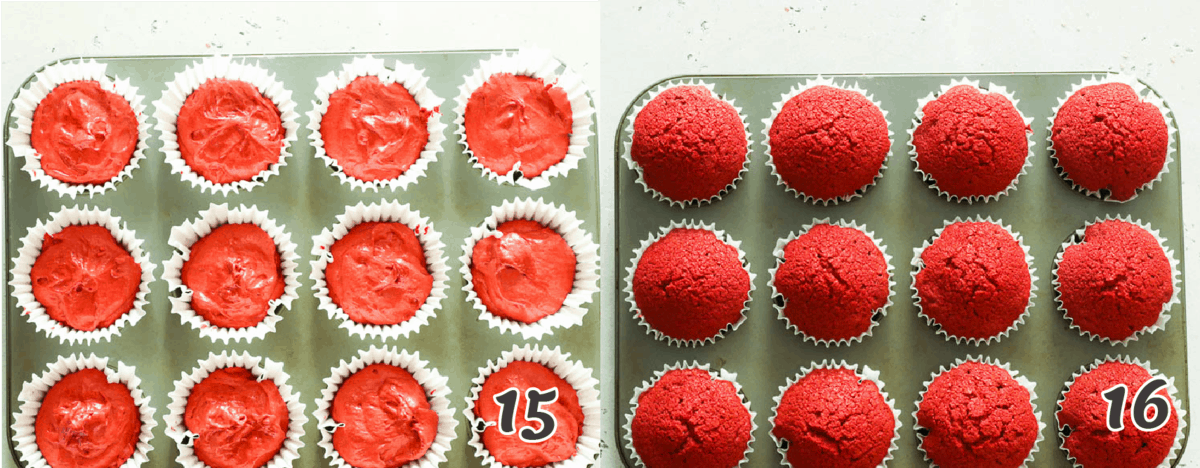
- Divide the batter evenly by scooping it into the greased and paper-lined cupcake wells with a measuring cup. Tap the pan on the countertop to release bubbles. (Photo 15)
- Bake at 350℉ (180℃) for 25-30 minutes or until a toothpick inserted in a cupcake comes out clean. Let the cupcakes cool in the pan for 10-15 minutes. Remove them from the pan and let them cool completely. (Photos 16)
- Wrap the cupcakes in plastic wrap and chill them in the refrigerator for at least an hour, preferably overnight, for easier frosting.
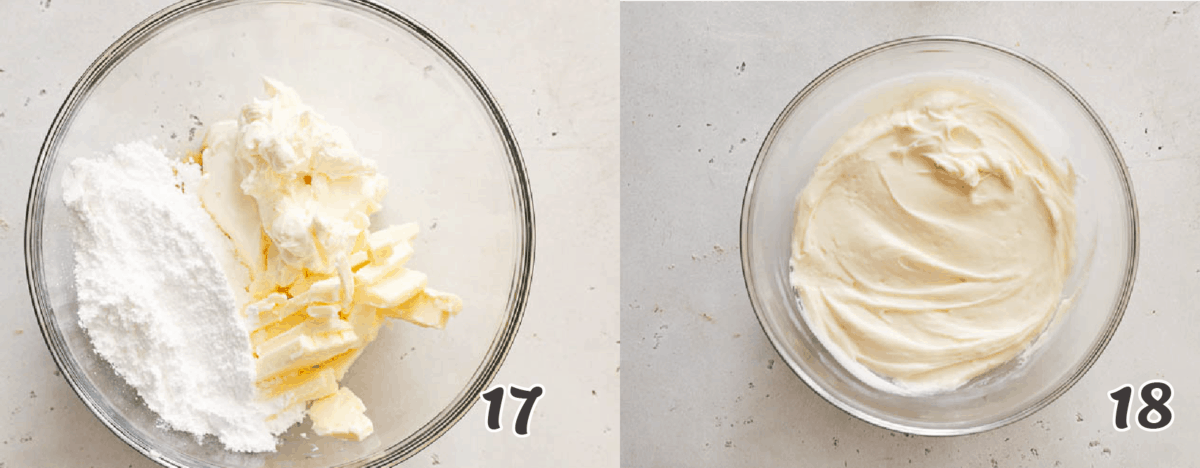
- Whisk cream cheese, butter, and vanilla extract until creamy with a stand or hand mixer.
- Sift in the powdered sugar, mixing as you go until the frosting reaches the right consistency. Transfer it to a piping bag and pipe the frosting onto your cupcakes. (Photos 17-18)
- Enjoy with a cup of coffee or tea.
Recipe Tips and Notes
- Make this recipe with gluten-free cake flour for those who prefer it that way.
- Fill the cupcake wells halfway to prevent them from overflowing when baked.
- Sift the dry ingredients to avoid lumps when mixed with the wet ingredients.
- Frost the cupcakes after they have completely cooled.
- For redder cupcakes, don’t go crazy with the cocoa powder. You want enough for a reaction, but not the chocolate brown color.
Make Ahead and Storage Instructions
Yes, definitely a great make-ahead time saver. Let the cupcakes cool completely, then store them and the frosting separately. If you’re making them for a cookout, go ahead and frost them, then store them in a Tupperware container meant for carrying muffins.
Cupcakes with cream cheese frosting will last a day or two at room temperature, but I prefer the refrigerator. They’ll last up to a week covered and chilled. They also freeze well for individual snack attack treats. Just warm them up in the microwave or leave them covered at room temperature until thawed.
More Decadent Baked Recipes to Enjoy
- Brown Sugar Pound Cake
- Orange Cinnamon Rolls
- Vanilla Cake
- Homemade Sandwich Bread
- Brown Butter Banana Bread
By Imma
Watch How to Make It
[adthrive-in-post-video-player video-id=”qeiEuDd7″ upload-date=”2021-02-05T08:00:00.000Z” name=”Best Red Velvet Cupcakes” description=”Every bite of this fluffy and moist red cupcake delivers you to a dreamy wonderland from its cream cheese frosting down to the last crumb. You’ll definitely enjoy the luscious texture of this baked treat. ” player-type=”collapse” override-embed=”false”]
This blog post was originally published in February 2021 and has been updated with additional tips, new photos, and a video.
Red Velvet Cupcakes
Ingredients
The Cupcakes
- 2¾ cups (330g) sifted cake flour
- ½ teaspoon (3g) salt
- 3 tablespoons (24g) cocoa powder, regular or Dutch-processed
- ½ cup (113g) unsalted butter at room temperature
- 1½ cups (300g) granulated white sugar
- ½ cup (113g) sour cream
- ¾ cup (177ml) oil (any neutral-flavored cooking oil)
- 3 large eggs
- ¾ cup (177g) buttermilk
- 2 teaspoons (10ml) vanilla extract
- 1 tablespoon (15ml) vinegar
- 2 tablespoons (30ml) liquid red food coloring
- 1 teaspoon (6g) baking soda
- 2 teaspoons (10ml) water
Cream Cheese Frosting
- 8 ounces (225g) cream cheese
- 4 ounces (113g) unsalted butter
- 1 teaspoon (5ml) vanilla extract
- 4-6 cups (480g-720g) powdered sugar
Instructions
The Cupcakes
- Preheat oven to 350℉ (180℃). Grease and flour two muffin (cupcake) pans (or two 9-inch round cake pans) with baking spray. Optionally line with cupcake liners. Set aside.
- In a medium bowl, combine the flour, salt, and cocoa powder, and set aside.
- Cream the butter and sugar at high speed in a stand mixer (or hand mixer) until fluffy and starting to look white, about 4 minutes. Then add the sour cream and mix for a minute. Follow with the oil, and mix for another minute.
- Add the eggs one at a time, beating the mixture well between each addition.
- Next, pour in the buttermilk, vanilla extract, and vinegar, and mix thoroughly.
- Add the red food coloring until the desired color has been reached.
- Slowly add the dry ingredients to the wet. Then mix the baking soda and water and gently fold them into the cake batter, scraping down the sides of the bowl as you mix.
- Divide the batter evenly by scooping it into the cupcake wells with a measuring cup. Tap the pan on the countertop to release bubbles.
- Bake at 350℉ (180℃) for 25-30 minutes or until a toothpick inserted in a cupcake comes out clean.
- Let the cupcakes cool in the pans for 10-15 minutes.
- Once the cupcakes have completely cooled, wrap them in plastic wrap and chill them in the refrigerator for at least an hour, preferably overnight. This makes frosting them so much easier.
Cream Cheese Frosting
- Whisk cream cheese, butter, and vanilla extract until creamy. You could use a mixer or do it by hand.
- Gradually sift in the powdered sugar, mixing as you go. Add enough sugar to reach the right consistency. Transfer it to a piping bag and pipe the frosting onto your cupcakes.
Tips & Notes:
- If you want to avoid red food coloring, add a medium roasted beet, peeled and pureed until smooth, to the wet ingredients. Then add a little more vinegar and a touch of vanilla to hide the beet flavor. Or you could replace a tablespoon or two of the flour with beet powder and add more vanilla extract.
- Please keep in mind that nutritional information is a rough estimate and can vary greatly based on the products used.


Amazing!! These came out perfect!
Glad you enjoyed it M.L :)!
Do I have to spray the cupcake liners?
Hi, Angela. You don’t have to spray the cupcake liners. Just make sure to spray or grease the muffin/cupcake pan instead (step #2).
Hello, can I half this recipe to make 12 cupcakes?
Hello Monet! Yes you sure can. Happy Baking!!
It only took my cupcakes about 15 minutes to cook.
Thank you for sharing, Grace! 🙂
beautiful recipe, thank you, immaculate
thanks for the recipe… please can I use margarine instead of butter…
Yes you sure can.
Thank you for this recipe. I just want to know, can cake flour be substituted with all-purpose flour?
And can sour cream be subtracted without any adverse effect to the outcome? Thank you!
Hi Comfort,
Yes you can sub with all purpose flour. Sour cream adds moistness and acidity to the cupcakes, sub with yogurt or leave it out. Do let me know how it works out. Thanks.