How to Blanch Green Beans
They’re one of the easiest veggies to work with, and blanching green beans is even easier. They cook quickly, are naturally tasty, and are pleasantly crisp when blanched. Season them with salt and pepper, and you’ll have a deliciously healthy side dish in no time.
In Southern talk, a mess of green beans is when you have a bunch of them. What to do? That’s when a fail-proof technique to blanch green beans is a lifesaver. That way, you don’t waste nature’s bounty.
Plus, it’s super fast and easy, so I wonder why I don’t do it more often. Besides being delicious, it improves the texture and taste to fit your dish. That and blanched veggies are ideal for the freezer.
Why Blanching Is Practical
Green beans (string beans or snap beans, because they snap easily) are seasonal and best fresh. And when blanched, you can freeze them or add them to salads for a quick and healthy addition. They’re also delicious tossed at the last minute into sautés, stir-fries, roasted veggies, soups, stews, pasta, and salads.
How to Blanch Green Beans
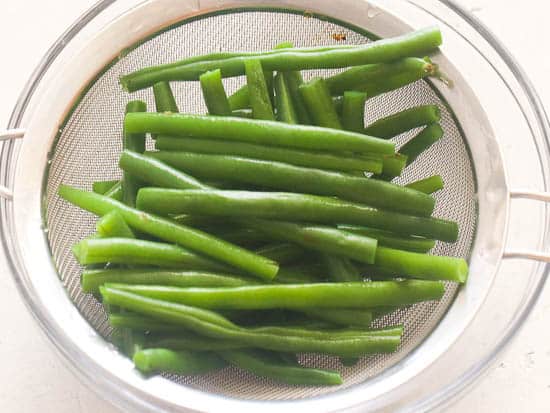
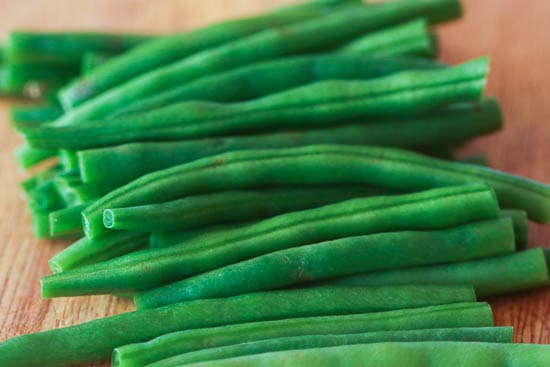
- Rinse the green beans in a colander under running water, then give a shake to dry.
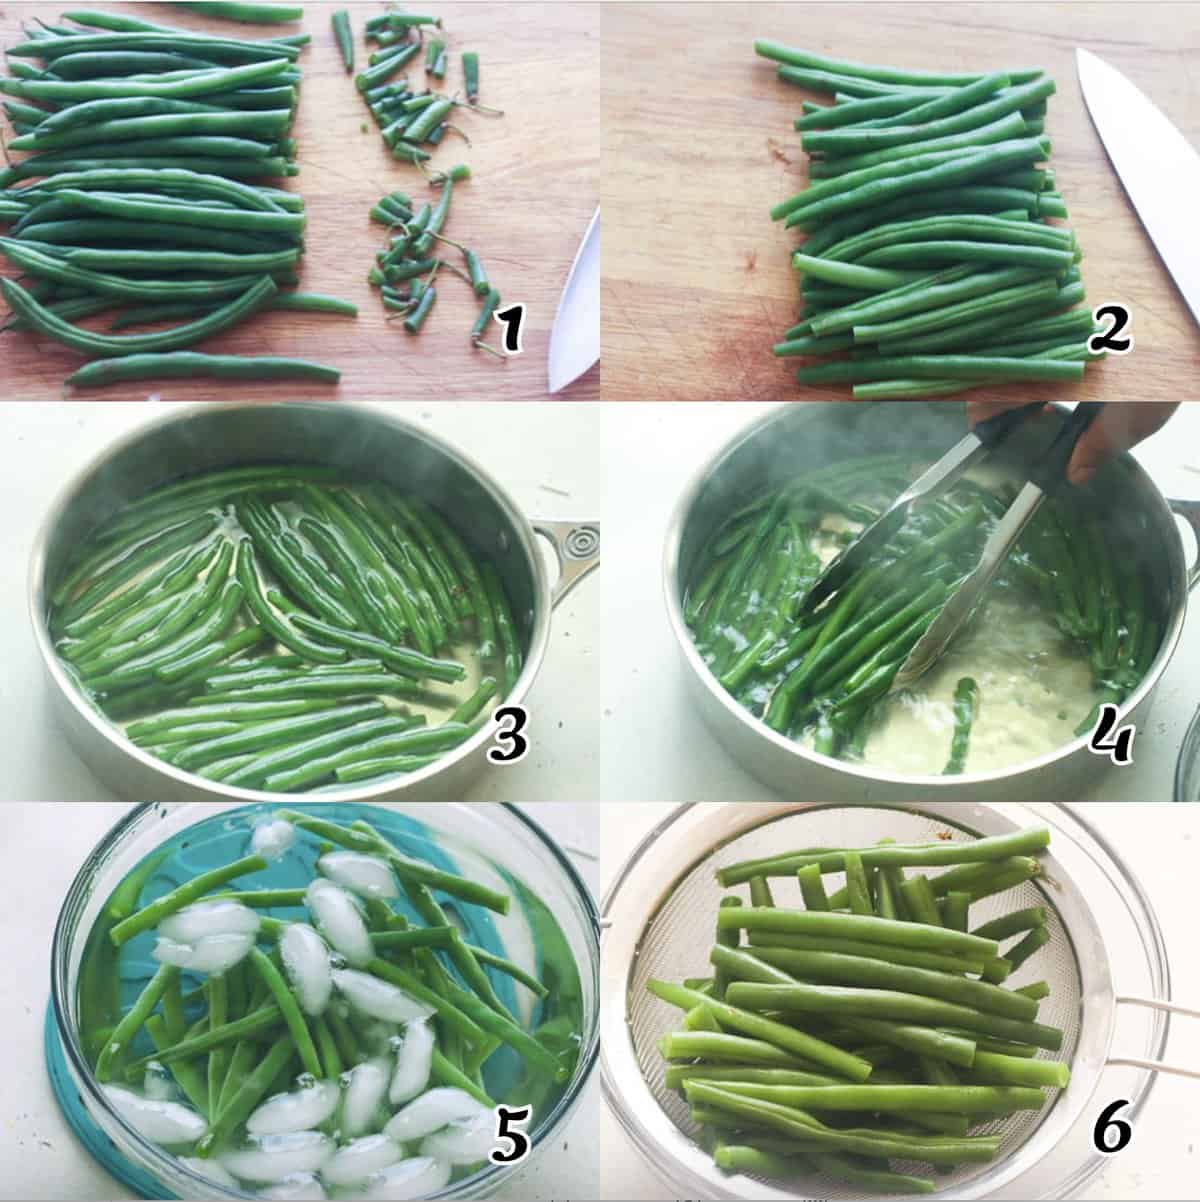
- Trim the ends easily by individually snapping off the non-edible ends or cutting off the tips of three or more green beans at the same time using a knife or kitchen scissors. Remove tough strings at the sides of the beans (if they have them). (Photos 1-2)
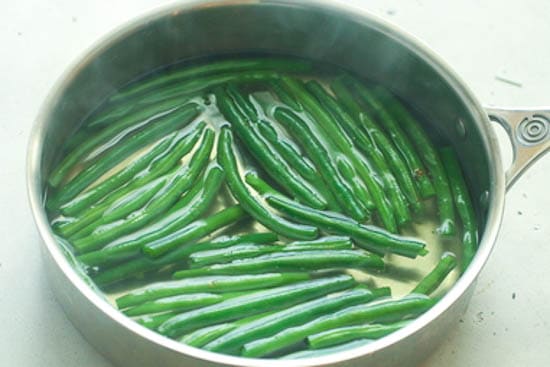
- Pour about four quarts of water into a large pot. The pot should hold enough water to cover the green beans without boiling over. Add salt.
- Prep an ice bath with ice cubes and water in a large bowl so you can put the beans in as soon as they come out of the boiling water.
- Cook: Add the green beans to the boiling water for 3-5 minutes until they’re tender-crisp and the color is bright green. (Photos 3-4)
- Transfer them to the ice bath. (Photo 5)
- Drain completely after cooling, and they are ready to use. (Photo 6)
Blanching Tips
- Keep an eye on the pot! Keep the green beans from cooking completely. Once the color becomes brighter, remove it immediately from the heat.
- Always trim and snap stem ends. Remove any tough strings for a more enjoyable experience.
- Wash with cold water and shake them dry.
- Boil the salted water first before adding the green beans. This avoids overcooking and the beans from tenderizing before giving a bright green color.
Storage Instructions
Storing fresh green beans is different from storing blanched green beans. Fresh green beans can be kept in an open bag in your fridge for up to seven days. Only wash them before using, and not if you’re planning to store them longer, or else they may mold.
You can store blanched green beans in a ziplock bag and refrigerate them for one week or freeze them for nine months.
To flash freeze them, pat them dry, and arrange them in a sheet pan with parchment paper in a single layer. Once they freeze solid, transfer them to an airtight bag or resealable bag.
Note: Don’t freeze unblanched green beans, or you’ll end up with dull and mushy green beans.
How to Use Blanched Green Beans
If you want to use them, just thaw them and add them to anything you want. Some great recipes to throw them into are three-bean salad, Poulet DG, Nicoise salad, and minestrone soup.
More Fantastic Green Bean Recipes to Try
- Green Beans and Bacon
- Bacon-Wrapped Green Beans
- Green Bean Casserole
- Southern Green Beans and Potatoes
- Slow Cooker Chicken Curry
How to Blanch Green Beans
Ingredients
- 1 pound (450g) green beans, washed and trimmed
- 4 quarts (3.75l) boiling water
- 3-4 tablespoons salt
- Ice cubes
- Cold water
Instructions
- Place the green beans in a colander and rinse under running water, then give a shake to dry.
- Trim the ends easily by individually snapping off the non-edible ends or cutting off the tips of three or more green beans at the same time using a knife or kitchen scissors. Remove tough strings at the sides of the beans (if they have them).
- Pour about four quarts of water into a large pot. The pot should hold enough water to cover the green beans without boiling over.
- Calculate the amount of salt (1 tablespoon per quart) and stir it into the water.
- While your water is coming to a boil, put ice cubes and water in a large bowl so you can put the beans in as soon as they come out of the boiling water.
- Add the green beans to the boiling water for 3-5 minutes until it's tender-crisp and the color is bright green.
- When the desired color and texture are achieved, remove them immediately from boiling water and transfer them to the ice bath.
- Once the beans cool, drain them completely, and they are ready to use.
Tips & Notes:
- Keep an eye on the pot! Keep the green beans from cooking completely. Once the color becomes brighter, remove it immediately from the heat.
- Always trim and snap stem ends. Remove any tough strings for a more enjoyable experience.
- Wash with cold water and shake them dry.
- Boil the salted water first before adding green beans. This avoids overcooking and the beans from tenderizing before giving bright green color.
- Please remember that the nutritional information is a rough estimate and can vary significantly based on the products used in the recipe.