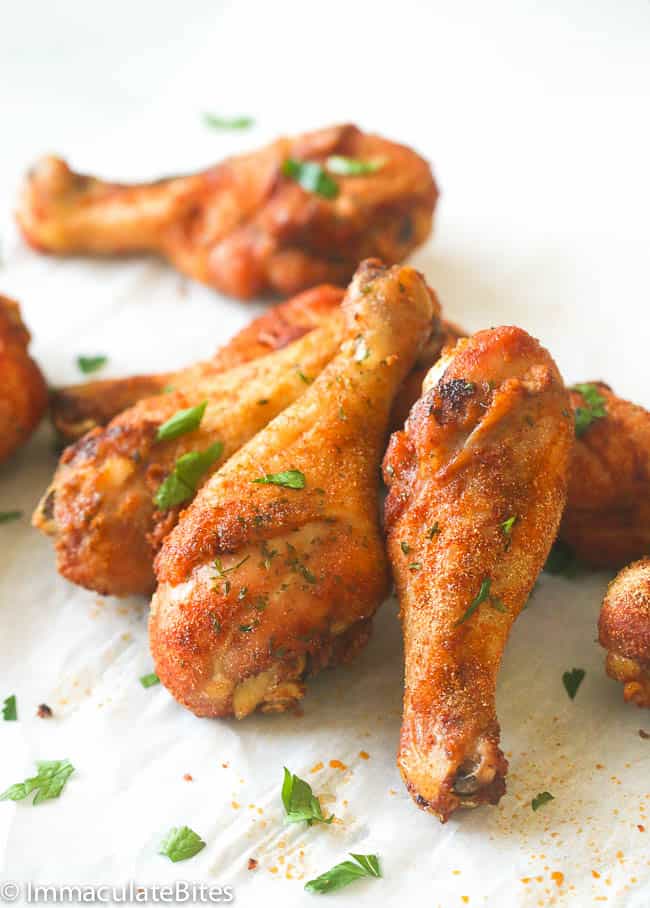
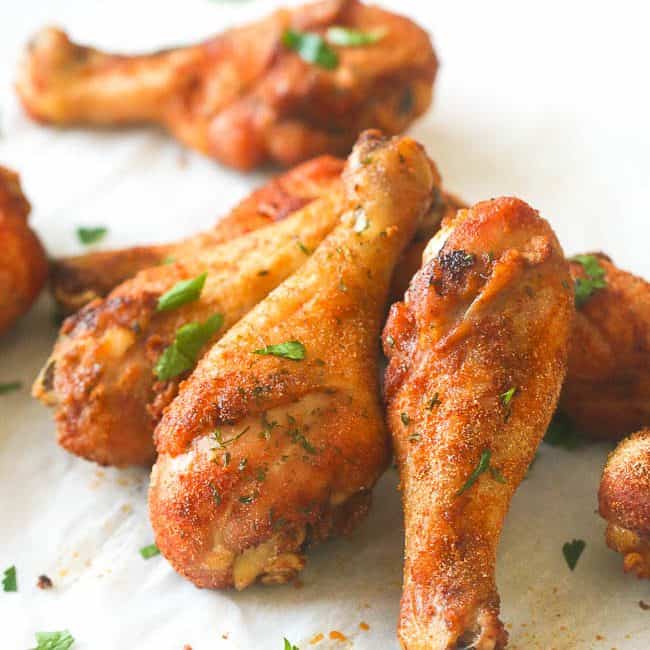
Baked Crispy Chicken Legs
Baked crispy chicken legs, thanks to a few simple tricks, deliver crispy drumsticks with tender, juicy meat. Insanely flavorful chicken is quick, easy, paleo, and gluten-free with only 10 minutes of prep time! A win-win!
Inspired by the success of my crispy baked chicken wing recipe, I decided to give chicken legs a spin. They have the same flavorful bite and crispy, crunchy coating without breadcrumbs or flour. All you need are a few pantry staples to turn ordinary chicken legs into out-of-this-world delicious.
The crunchy skin and mouthwatering flavor make this recipe a crowd-pleaser for adults and kids alike. Not to mention how versatile it is! Feel free to experiment with your favorite herbs and spices to put a new spin on this dish every time you make it.
How to Bake Chicken Legs Crispy
Most importantly, ensure the drumsticks are dry before baking for super crispy skin. And since chicken legs are larger than wings, I increased the amount of onion and garlic powder for better flavor. You have nothing else to worry about because baking crispy chicken legs is waaay easier than you think.
- First, carefully wash the chicken with running tap water and place them in a single layer on a sheet pan. Let them dry in the fridge, uncovered, for a minimum of 3 hours for crispy chicken skin.
- Next, season the chicken when ready to bake.
- Then, arrange them on a wire rack in a single layer and pop them in the oven.
- Rotate the chicken legs halfway through to ensure they cook evenly on all sides.
How to Bake Crispy Chicken Legs
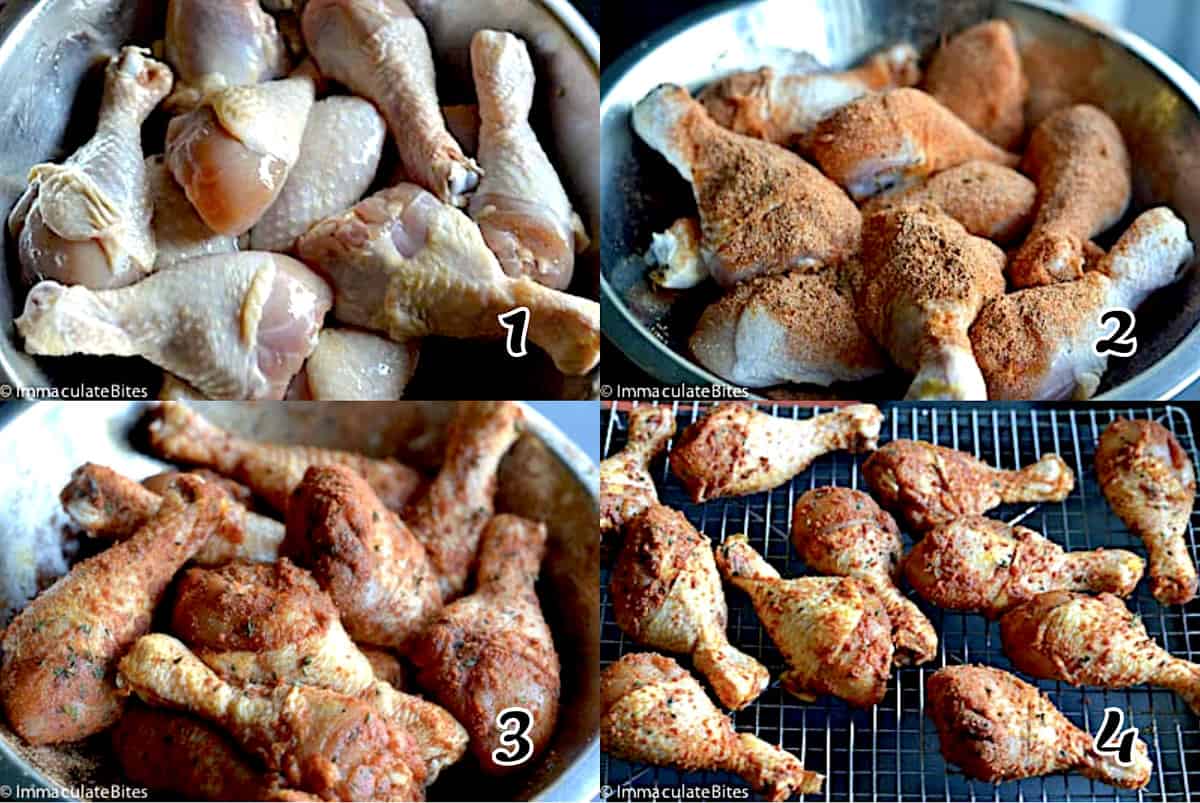
- Prepare Chicken – Wash the chicken legs and place them on a cookie sheet in a single layer. Then let them sit in the fridge, uncovered, for at least 3 hours or preferably overnight to air-dry. (You can skip this part and proceed with the spices, but they won’t be quite as crispy.)
- Preheat oven to 425°F (220℃).
- Season – Place the chicken in a large bowl, add the spices, and drizzle with oil. Mix well to coat the chicken.
- Prep the Baking Sheet by lining it with foil and putting a wire rack on top. Place the chicken legs in a single layer on the wire rack. While the chicken legs are baking, the oil will drip to the bottom of the pan.
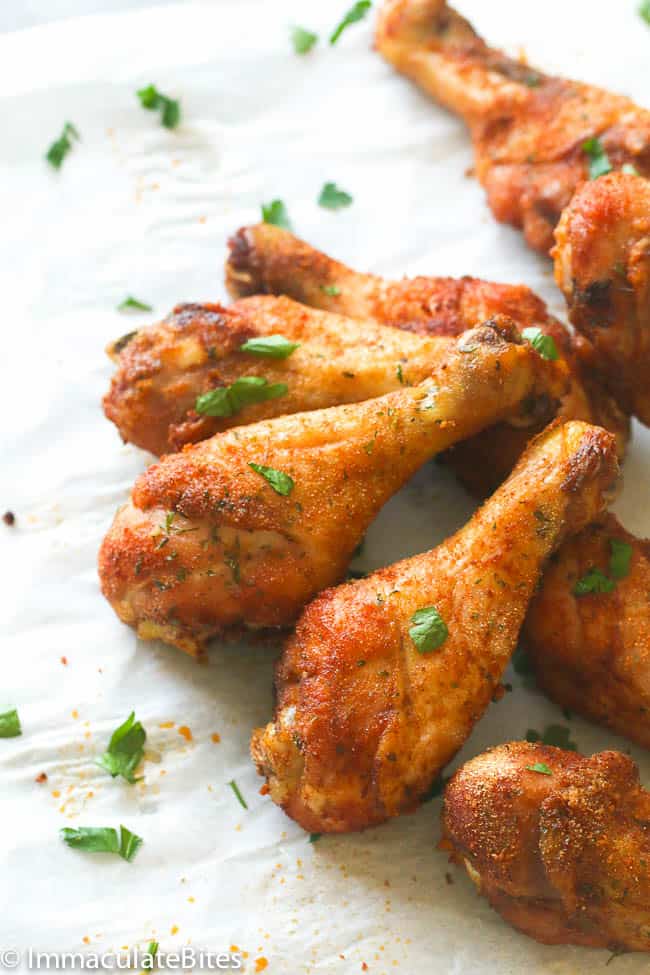
- Bake chicken legs until cooked through and the skin is crispy (45-50 minutes). Rotate chicken legs halfway through, at roughly 20 minutes. (Actual bake time depends on your oven and altitude, but a meat thermometer should read an internal temperature of 165℉/75℃).
- Serve – Take the crispy chicken legs out of the oven and serve with African pepper sauce.
Recipe Variations
- Seasoning swap. Replace the seasonings with your favorite premade seasoning blend. Try a zesty Cajun Creole seasoning or taco seasoning if you’re craving something with a Mexican flair!
- Seasoning add-ins. Add a dash of cumin to the seasoning mix for deep, slightly nutty notes. A touch of lemon pepper will add a fresh, citrusy punch to the mix. And smoked paprika adds an extra zing with delicious smokiness.
- Meat swap. You can replace the chicken legs with bone-in chicken thighs or cut up the whole chicken.
- Garnish. For additional flavor, sprinkle your crispy chicken legs with Parmesan, chopped parsley, or green onion. They also add a gorgeous pop of color.
- One-pot meal. Roast potato wedges and carrot chunks underneath the chicken legs to make a one-dish meal. Lightly coat the potatoes and carrots in olive oil and sprinkle with more seasonings before placing them on the baking sheet.
Tips and Tricks
- Taking the chicken legs out of the fridge 10-15 minutes before baking will help them cook more evenly.
- If you’d like even crispier skin on the chicken legs, turn the broiler on for a minute or to crisp them even more. Keep an eye on them, though, because the broiler cooks fast.
- Let the chicken rest 5-10 minutes after cooking for super juicy, tender meat.
- These golden beauties are delicious baked in an air fryer, as well. Air fry them at 400℉ (205℃) for 20 minutes, flipping them halfway through. Enjoy!
Make-Ahead and Storage Instructions
Crispy baked chicken legs require just 10 minutes of prep time, so they’re perfect for busy weeknight meals! To get a jump on meal planning, you can season the chicken legs ahead of time. Then, keep them in the fridge for a day or two, or freeze them for 2-3 months. When you need a quick meal, simply leave them in the fridge overnight to defrost and pop them in the oven.
Refrigerate leftover baked chicken legs in an airtight container for up to five days or freeze them for 4-6 months. Thaw overnight in the refrigerator before reheating.
Reheat the chicken legs in the oven at 350℉ (180℃) until heated through. You could also reheat individual portions in the microwave, but they won’t crisp back up.
I love using leftover chicken for chicken salad for sandwiches or Caesar salad. Remove and discard the skin (no longer crispy and delicious) and bones, chop the chicken into chunks, and you’re good to go.

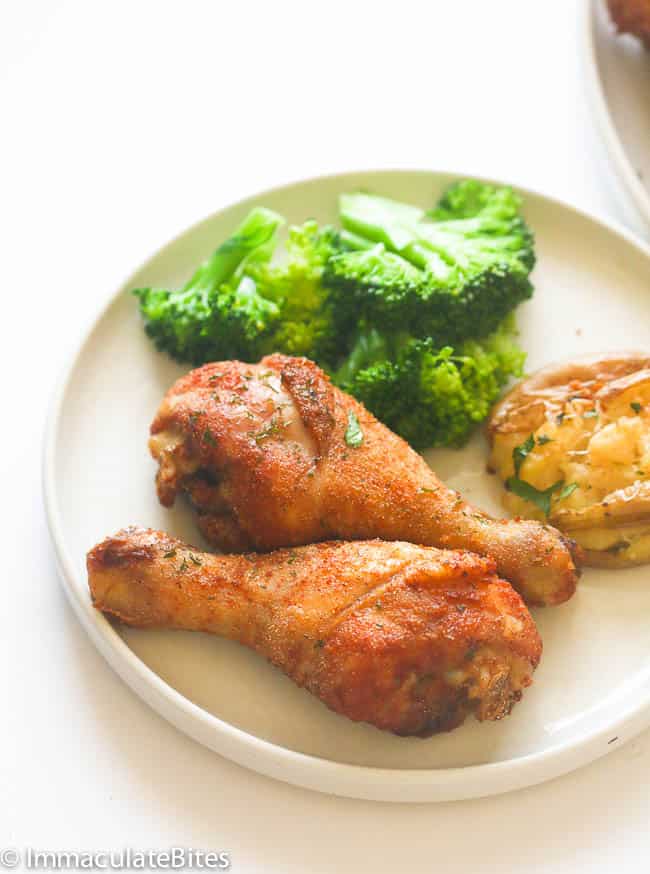
What Goes With Crispy Oven-Baked Chicken Legs
Countless winning combinations go great with this tasty chicken recipe. Some delicious side dishes are scalloped potatoes or garlic mashed potatoes and Southern baked beans with bacon. Add a fresh tossed salad and a crisp Sauvignon Blanc or bright Pinot Noir to complement the perfectly seasoned meat.
More Easy Baked Chicken Recipes to Try
- Baked BBQ Chicken
- Jerk Chicken Wings
- Baked Crispy Chicken Wings
- Oven Baked Chicken Breast
- Baked Chicken Spaghetti
Watch How to Make It
[adthrive-in-post-video-player video-id=”5X6eNFxT” upload-date=”Mon Aug 06 2018 19:45:03 GMT+0000 (Coordinated Universal Time)” name=”Baked Crispy Chicken Legs” description=”Baked Crispy Chicken Legs – A few simple tricks makes this chicken legs crispy on the outside, tender and juicy on the inside, and ridiculously flavorful. It’s quick, easy, paleo, gluten-free and only requires 10 mins prep.”]
This blog post was originally published in November 2013 and has been updated with additional tips, new photos, and a video.
Baked Crispy Chicken Legs
Ingredients
- 3-3½ pounds (1.3-1.5k) chicken legs
- 1 tablespoon (6g) dried Italian herbs
- 1¼ teaspoons (7g) salt
- 1½ tablespoons (9g) onion powder
- 1½ tablespoons (8g) garlic powder
- 1 teaspoon (2g) smoked paprika
- 1 teaspoon (2g) white pepper
- ½ teaspoon (1g) cayenne pepper
- 1 teaspoon (3g) bouillon powder (or replace with salt)
Instructions
- Wash the chicken legs and place them on a cookie sheet in a single layer. Then let them sit in the fridge, uncovered, for at least 3 hours or preferably overnight to air-dry. (You can skip this part and proceed with the spices, but they won't be quite as crispy).
- When ready to bake, preheat oven to 425°F (220℃).
- Place the chicken in a large bowl, add the spices, and drizzle with oil. Mix well to coat the chicken.
- Line a baking pan with foil, and top with a wire rack. Arrange chicken legs in a single layer. While the chicken legs are baking, the oil will slowly drip to the bottom of the baking pan.
- Bake chicken legs until cooked through and skin is crispy (45-50 minutes). Rotate chicken legs halfway through, at roughly 20 minutes. (Actual bake time depends on your oven and altitude, but a meat thermometer should read an internal temperature of 165℉/75℃).
- Take the crispy chicken legs out of the oven and serve with African pepper sauce.
Tips & Notes:
- Taking the chicken legs out of the fridge 10-15 minutes before baking will help them cook more evenly.
- If you’d like even crispier skin on the chicken legs, turn the broiler on for a minute or to crisp them even more. Keep an eye on them, though, because the broiler cooks fast.
- Let the chicken rest for 5-10 minutes after cooking for super juicy, tender meat.
- These golden beauties are delicious baked in an air fryer, as well. Air fry them at 400℉ (205℃) for 20 minutes, flipping them halfway through. Enjoy!
- Please keep in mind that nutritional information is a rough estimate and can vary greatly based on the products used.


I paper towel dry too. I never have the space to lay out chicken on a sheet pan!
Five Stars for sure! These were delicious and this is my new go-to recipe for chicken drumsticks every time!!!
Good recipe, Imma. Made it tonight for the family. Everyone liked it.
Great! Thanks for the feedback
Have you ever done them on the bbq?
It’s hot out but we love this recipe and want to make it but not heat up the house…
– I seriously make this recipe in my regular meal plan once or twice a month!
I hear you. Yes I have and it works out just fine.
Mine turned out exactly like the picture… perfect !
This is the best chicken drumstick recipe on the internet!! Thank you Imma!
I’ll take that ! Thanks so much!!
We love these drumsticks! They’re in our regular meal rotation.
To wash or not to wash – really now who gives a cluck?
Great recipe 🙂 thank you for posting it!!
Hahah. Thanks, Kerri :)!
So good spicy, crispy and juicy
Its was excellent. Thank you
Glad to see you guys sharing ideas. Really warms my heart
Hi Imma! I am in the process of drying out my drumsticks in the fridge! I was scrolling through a couple other recipes that called for baking powder I order to help crisp up the skins. Is that step unnecessary with this recipe due to the drying out time? TBH I prefer your recipe because it keeps it more natural.
Hi Meredith! I really haven’t tried using baking powder in order to crisp the skins before, so I am not quite sure how it will affect this recipe. As you said, I try to keep it natural :)!
Loved the level of spice. Hot enough to give a little sweat. Would love the addition of a sauce recipe that might take a little heat away.
The recipe switches back and forth between “chicken leg” and “drumstick”, which is a bit confusing. They aren’t the same thing; “Leg” includes the thigh too.
Butterworth Ray, No. Legs that include the thighs are called leg quarters. A leg and a drumstick are the same thing 🙂
Have been doing chicken this way for years in the oven. Haven’t been disappointed yet!
Thanks so much!!
Really good! Came out nice and crispy!
Only thing I did different was use only half of the cayenne. It was very flavorful and not too spicy. Works well with my keto lifestyle
These had a lot more spice than I was anticipating. Only one person in my family of 5 was able to eat them as is. Everyone else had to remove the skin entirely before eating.
I JUST now made this. REALLY good flavor. I didn’t use a rack but will next time. I changed the spices used for this recipe. I omitted the smoked paprika since I didn’t have any on hand but I’m sure that would’ve made a big difference in flavor. I also added Mrs. Dash. It didn’t crisp up as I had hoped but I’m sure that has a lot to do with not using the rack but again the flavor is amazing. The skin is at least not slimy but dry but would’ve preferred crispy. I like the heat the cayenne adds. I left the skin on my drumsticks, patted them dry with a paper towel. Didn’t rinse first or dry in the fridge. I also didn’t use the bouillon, just added more salt. I might add bread crumbs next time to add a bit more crunch. Good recipe to start and modify as you see fit. Serving with brown rice/quinoa mixture and corn on the cob.
When the skin isn’t as crispy as you would like, just turn on the broiler for a few minutes and that will do the trick! No wire rack needed
What if I don’t have time to let them dry? *I just drained and shook them vigorously lol* Will I get the same delicious results if I followed all the other directions to a T?
Haha. I paper dry it and do all of the above . It works for those days when you are in a hurry.
Washing chicken beforehand, when it’s intended for non-sashimi purposes is UNNECESSARY! Nothing can be removed by washing that isn’t removed by cooking. INSTEAD, washing spreads bacteria!
USA FOOD STANDARDS
https://www.fsis.usda.gov/wps/portal/fsis/topics/food-safety-education/get-answers/food-safety-fact-sheets/safe-food-handling/washing-food-does-it-promote-food-safety/washing-food
UK FOOD STANDARDS
https://www.nhs.uk/live-well/eat-well/never-wash-raw-chicken/
It doesn’t matter, my grandmother washed her chicken, my mother washed her chicken before cooking, I’m 60 years old and I always wash my chicken before cooking it for my family, and I taught my daughter to do the same. In all those generations no one got sick or died from eating our washed chicken. iF IT’S NOT BROKEN DON’T FIX IT.
Preach it Ann!’
My mom always taught us to wash the chicken first. Taught my daughter as well. We’re all still alive. ☺️
Long live the wisdom of mothers and grandmothers!
I make this chicken for iftar during Ramadan. Here I am again, 2020, double checking the spice ratios lol.My kids always ask for it come Ramadan! Haha, my mom was not a big cook, so internet is my stand in for that wisdom 🙂
Just a quick note to say you shouldn’t be washing your chicken. It won’t remove the bacteria, which will be killed by cooking, but it might spread the bacteria all over your kitchen. the CDC warns not to wash chicken due to increased food poisoning risk. you can air dry anyway, or pat it dry with a napkin.
Just a note…..everyone who is handling your chicken before it gets to you, may not be the type who washes their hands after using the restroom, etc. I prefer to wash my chicken and not think of what the last person who handled it may have left on it. You can wash and sanitize your sink after you wash the chicken. It has worked for generations, right?
I agree
Right – I always rinse chicken, fish and pork chops.
Sometimes I wash, sometimes I don’t ! Depending on my mood. Whatever one chooses is their choice! There’s no right or wrong, it’s what ever the heck YOU decide to do!!! End of story!! Enjoy your chicken everyone!
Hahaha. Yesss this sounds like me .
dundee is right, but if it makes you feel better nobody is handling the chicken that comes from grocery stores with bare hands before it arrives in your kitchen. Your recipe is amazing! I’m sorry to nitpick.
Delish!!! Ty!
How much oil and what type?
About 2 Tablespoons. Any cooking oil works just fine.
For decades I have been using grocery store paper bags, to drain my home made french fries. You just drop the fries into the bag , right out of the grease, season with salt and pepper, hold the top together and shake. Anyway I wrote this cuz when I make your chicken legs I will wash and then put in the paper bag and shake till water is gone. I think it will be faster and easier. Can’t wait to try this recipe, thank you.
This recipe is a winner
What type of oil do I need to use to drizzle the chicken with? I am drizzling the chicken, right?
Hi, Tasha, Yes, you are to drizzle the chicken with canola oil. Others have also used avocado oil or peanut oil or any oil with high smoking point.
I made a dumb comment. It does say drizzle with oil. Lol. If you want it paleo use the others she mentions.
Love this recipe! How can this be adapted for Air Frying? I just purchased a new Air Fryer and wondering if there would be any changes involved.
Hi Donna. Sorry, I can’t answer that though ’cause I haven’t tried this with an air fryer.