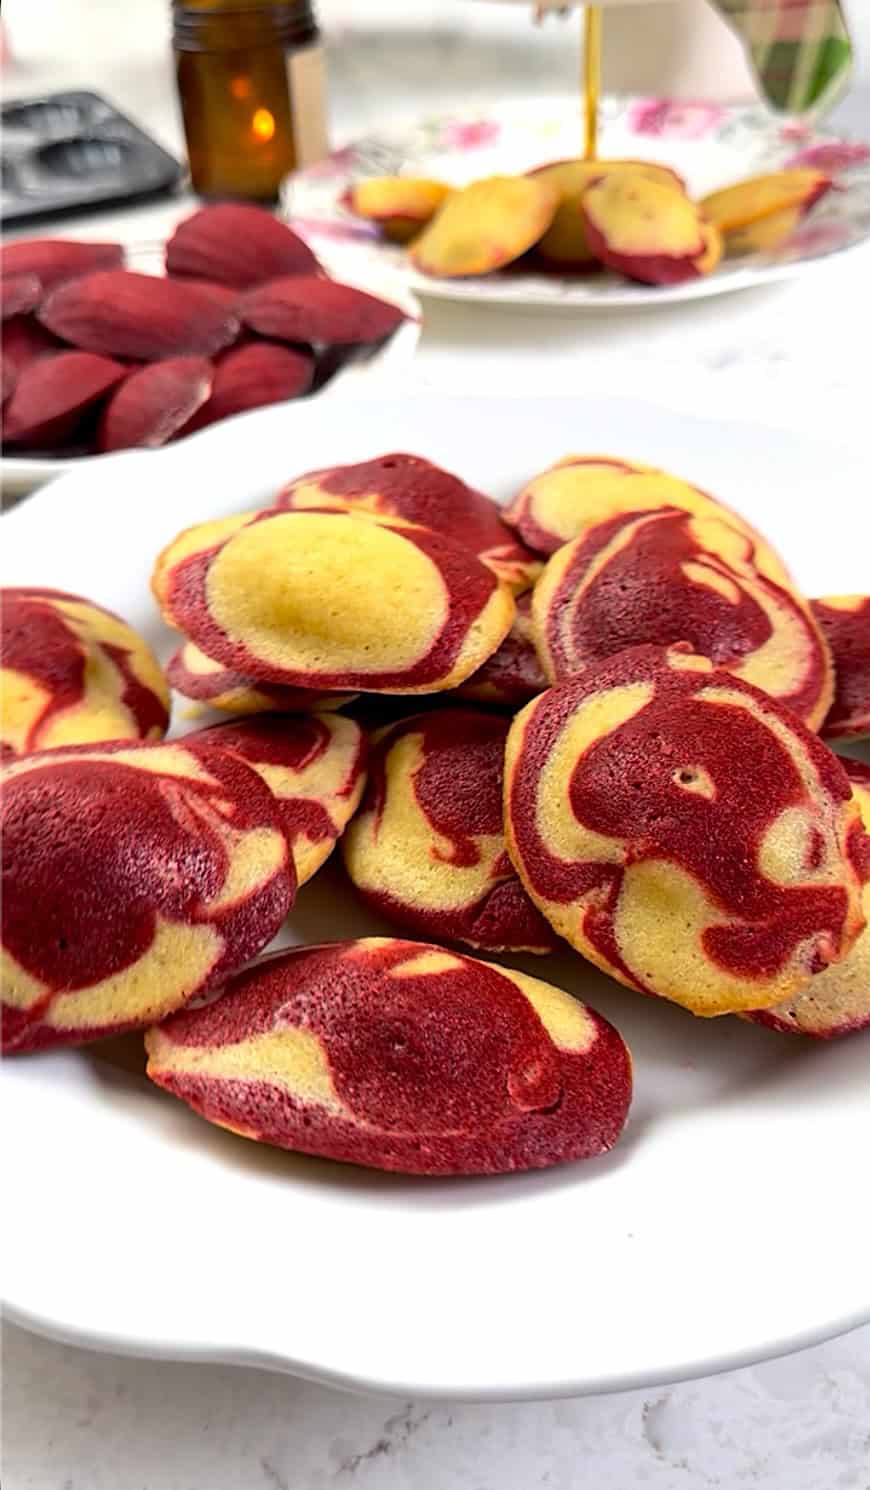
Red Velvet Madeleines
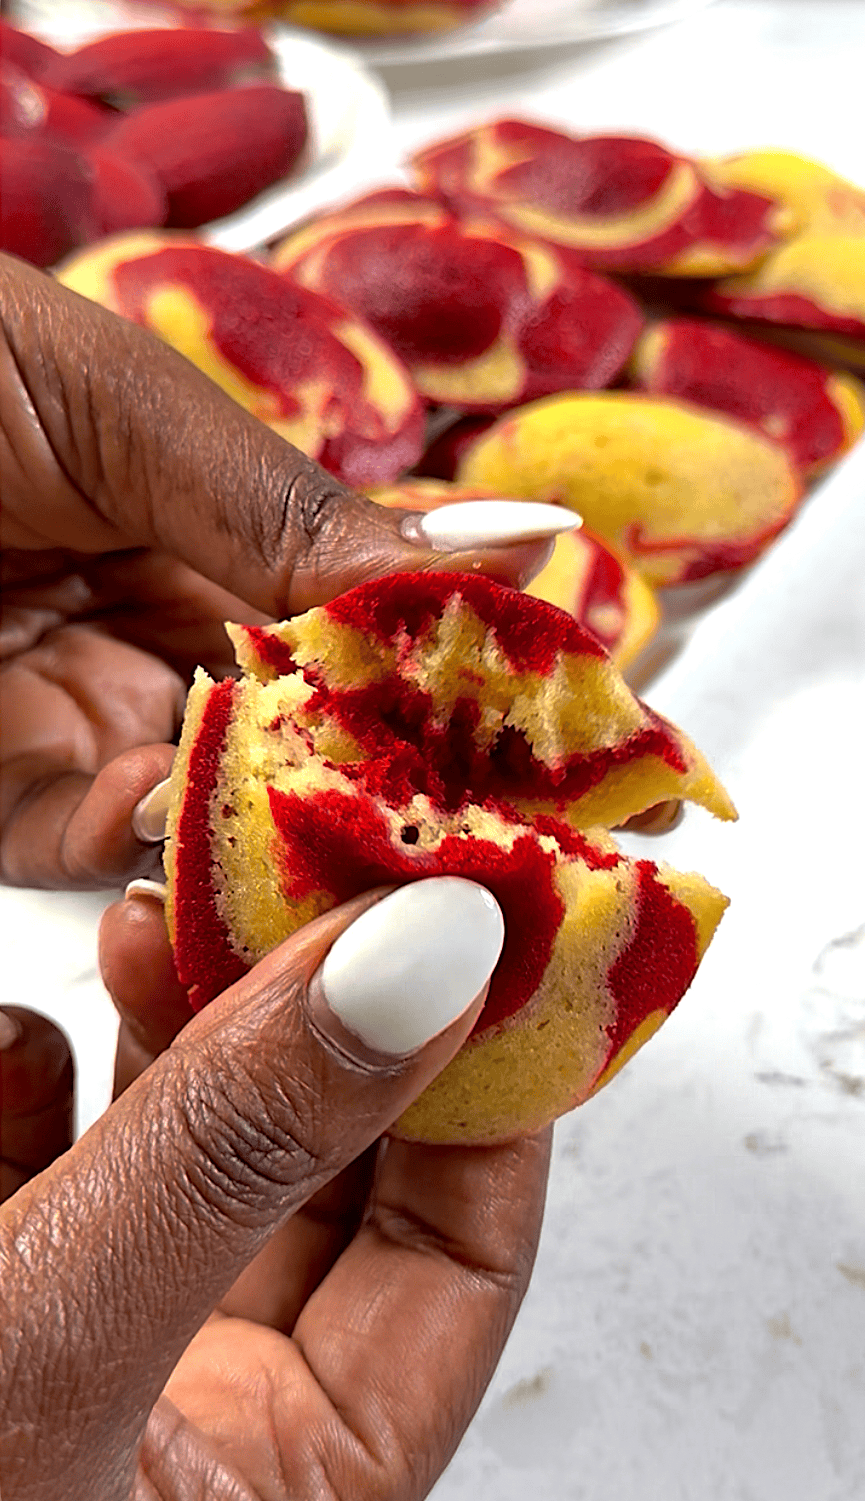
There’s something wildly satisfying about these marbled red velvet madeleines. It probably comes down to the fact that they look so dang fancy, but secretly, they take very little effort. Soft, buttery, lightly crisp at the edges, and swirled with chocolate or red velvet flair, they’re the kind of treat that makes people assume you definitely know what you’re doing.
The first time I made madeleines, I was convinced they were reserved for French pastry chefs with starched aprons and zero personality. Turns out, they’re just mini sponge cakes with great PR.
Adding marbling delivers a playful twist on the traditional French shell cake. They’re usually enjoyed with coffee and tea, but are also beautiful on a dessert platter. They’re economical (pantry staple ingredients), quick, and customizable to fit your marble mood. Speaking of marbling…
Marbling Madeleines With Red Velvet
Once I realized how forgiving madeleines are, I had fun experimenting. Vanilla is traditional, chocolate is dependable, but together? That’s personality. These cookies give you a bakery-level dessert or snack with home-kitchen ease. Plus, they’re ideal when you want something elegant enough for guests but low-stress enough for Tuesday afternoon baking vibes.
How to Make Red Velvet Madeleines
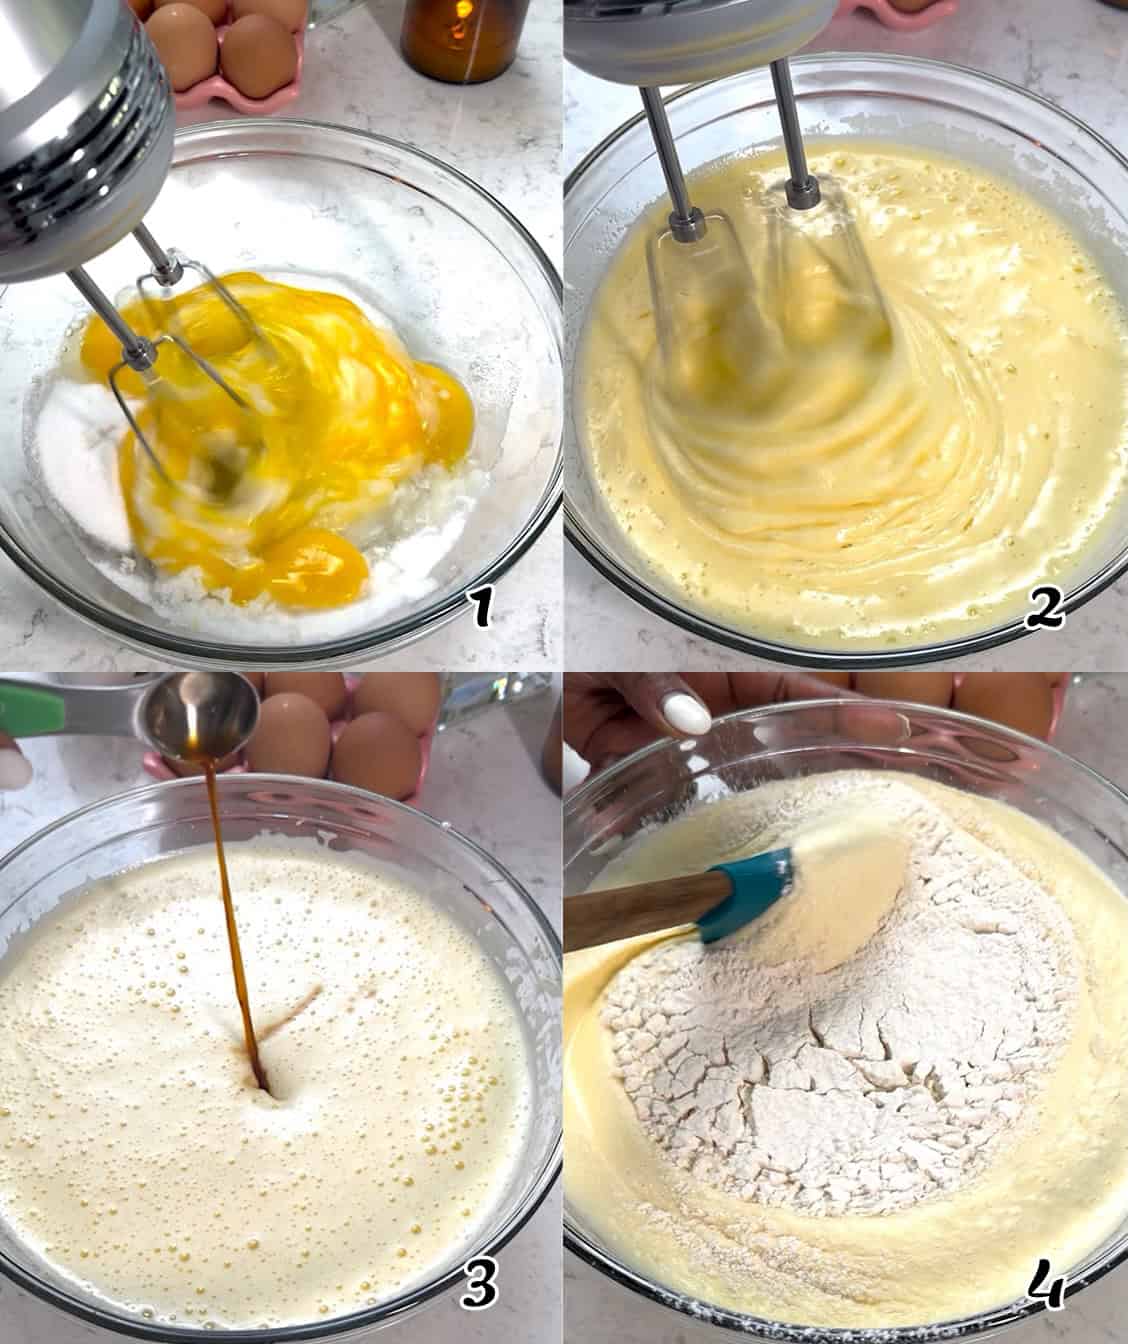
- Beat eggs and sugar for 2-3 minutes until pale, light, and slightly fluffy. Giving this step enough time builds structure. Then stir in vanilla extract. (Photos 1-3)
- Sift the flour, baking powder, and salt in a separate bowl.
- Fold the dry ingredients gently into the egg mixture with a spatula. Add the lemon zest now if using. (Photo 4)

- Drizzle in the melted (and slightly cooled) butter, gently folding until the batter is smooth. Scrape down the bowl to make sure everything is evenly combined. (Photos 5-6)
- Divide the batter based on your preference—half and half for bold contrast, or a smaller portion for subtle swirls.
- Mix the cocoa powder with just enough liquid to loosen it into a smooth, pourable batter. Then add red food coloring and optional sugar, and gently mix it into the marbling batter. (Photos 7-9)

- Spoon vanilla and marble batters alternately into each mold, filling each about three-quarters full. (Photo 10)
- Swirl the batters gently with a toothpick (less is more). Bake 10-12 minutes until golden and springy. Cool briefly, transfer to a rack, dust with powdered sugar, and marvel at your work. (Photos 11-12)

Notes and Tips
- Add cocoa powder, espresso, and a splash of coffee liqueur (like Kahlúa) to the marble batter for a rich, grown-up coffee-chocolate swirl with subtle after-dinner vibes.
- Replace cocoa with 2-3 tablespoons of seedless raspberry preserves or jam. Add more coloring for a vivid red.
- Melt the butter first, so it has time to cool slightly—hot butter can deflate the batter.
- Swirl gently. Over-swirling turns marble into mud, and nobody wants that.
- If your mini cakes stick, tap the pan gently upside down—don’t pry.
Make-Ahead and Storage Instructions
You can make the batter up to 12 hours ahead and store it covered in the fridge. Let it sit at room temperature for about 10 minutes before baking.
Baked madeleines keep well in an airtight container at room temperature for 2 days or in the refrigerator for 4-5 days. You can also freeze them for 2-3 months—just thaw before serving.
What Goes With Red Velvet Madeleines
These are perfect with coffee, espresso, or a chai tea latte. Serve them alongside fresh berries, a dollop of whipped cream, or even dipped halfway in melted chocolate if you’re feeling extra. They also make a great addition to brunch spreads, breakfast charcuterie boards, and dessert tables.
More Elegant Dessert Recipes to Try
- Red Velvet Marble Pound Cake
- Red Velvet Cheesecake
- Blue Velvet Cake
- Madeline Cookies
- Chocolate Rum Marble Cake
By Imma
Marble Red Velvet Madeleines
Ingredients
Base Batter
- 8 tablespoons (227g) unsalted butter, melted but not hot
- 3 large eggs
- ½ cup (100g) granulated sugar
- 1 teaspoon (5ml) vanilla extract
- 1 cup (120g) all-purpose flour
- 1 teaspoon (4g) baking powder
- ¼ teaspoon (1g) salt (optional)
- 1 tablespoon (6g) grated lemon zest (optional)
Chocolate or Red Velvet Marbling
- 1-2 tablespoons (5-10g) cocoa powder (adjust to taste)
- 1-2 tablespoons (15-30ml) liquid (coffee, milk, or water)
- 1-1½ teaspoons (15-20ml) red food coloring (see notes)
- 1 tablespoon (12g) sugar (optional)
- powdered sugar for dusting
Instructions
Base Batter
- Preheat your oven to 350°F (180°C). Generously grease and flour your madeleine pan or spray it well with baking spray.
- Melt the butter so it has time to cool and not curdle the eggs.
- In a mixing bowl, beat the eggs and sugar until pale, light, and slightly fluffy, 2-3 minutes. Stir in the vanilla extract.
- In a separate bowl, sift together the flour, baking powder, and salt. Gradually sift the dry ingredients into the egg mixture, folding gently with a spatula until fully combined. Add the lemon zest at this stage if using.
- Slowly drizzle in the melted butter, folding gently until the batter is smooth and cohesive. Scrape down the sides and bottom of the bowl to make sure everything is evenly mixed.
Marble Batter
- Decide how much marble you want, then divide the batter accordingly. For equal marbling, divide the batter in half, and for lighter marbling, keep about two-thirds of the batter plain and use one-third for the marbling. For bolder red velvet or chocolate, increase the marble portion slightly.
- Mix the cocoa powder with just enough liquid to loosen it up—coffee for a deeper flavor, milk or water if that’s what you have. Then add the red food coloring and mix well. Stir the mixture into the chocolate marbling batter until smooth and pourable.
- For red velvet, stir in the food coloring (starting with 1 teaspoon) and optional sugar, adjusting until the color and sweetness look right.
- Spoon the vanilla batter and marble batter alternately into each madeleine mold, filling each about three-quarters full. Use a toothpick or skewer to gently swirl the batters together. A few light swirls are enough—don’t overdo it or you’ll lose the marble effect.
- Bake for 10-12 minutes or until the edges are lightly golden and the centers spring back when gently pressed.
- Remove from the oven and let the madeleines cool in the pan for 3-5 minutes before transferring to a wire rack to cool completely.
- Once cooled, dust lightly with powdered sugar if desired and serve.
Tips & Notes:
- Feel free to leave out the red food coloring for chocolate marbled madeleines.
- You want just enough liquid to loosen the cocoa powder, so add it slowly.
- Coffee deepens the chocolate flavor, but milk and water work fine if you don’t like coffee.
- Alternatively, mix cocoa powder with coffee granules, then add enough water to create a smooth mixture.
- Start with less food coloring and build up to the desired color intensity.
- Gentle swirling gives you the prettiest marble.


Absolutely beautiful