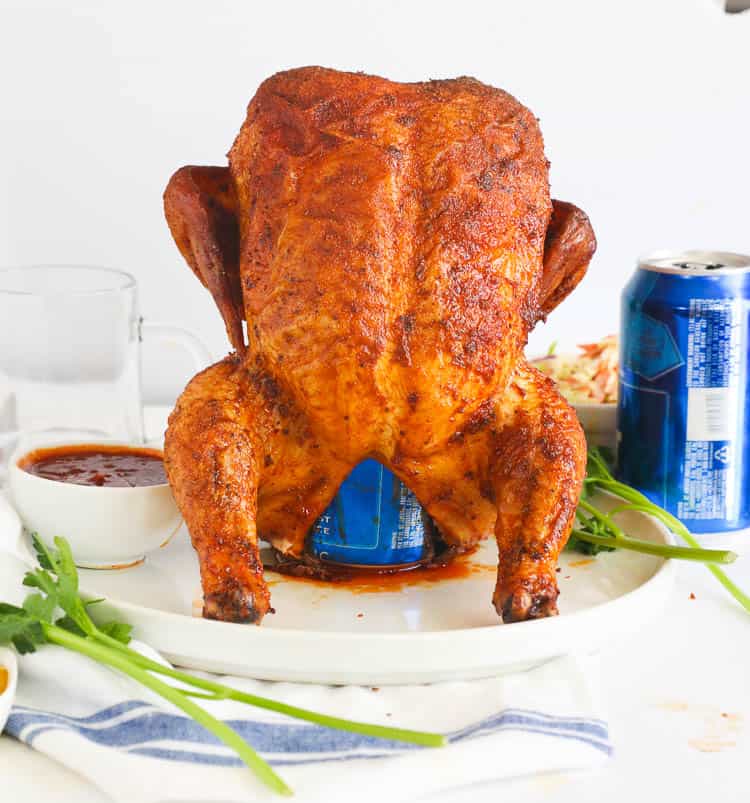
Smoked Beer Can Chicken
Smoked beer can chicken isn’t just fall-off-the-bone tender; it’s absolute fun. Give your taste buds the experience of a lifetime with this super-easy party centerpiece, even if it’s not a holiday.
I love community potlucks because I enjoy interacting with our community. And me being me, I always take advantage of the opportunity to try out new recipes.
I will never forget the reaction when I showed up with a smoked beer can chicken. Everyone was impressed with how it stood up, but then they tasted it. Years later, my neighbors still talk about it.

Why Use a Beer Can to Smoke Chicken
Besides being fun, the beer can supports the chicken in a standing position, allowing it to smoke more evenly. The beer still in the can also provides an inside job for extra moisture, resulting in juicier chicken. The yeasty beer flavor doesn’t hurt anything, either. Feel free to use alcohol-free beer or other beverages that come in a can.
Best Beer to Use
My first reaction was whatever beer happens to be in the fridge. However, I’ve learned that strong-flavored beers, like stouts or IPAs, might be a little bitter. That said, lagers are a good choice, as is just about any pale or mild beer.
How to Smoke Beer Can Chicken
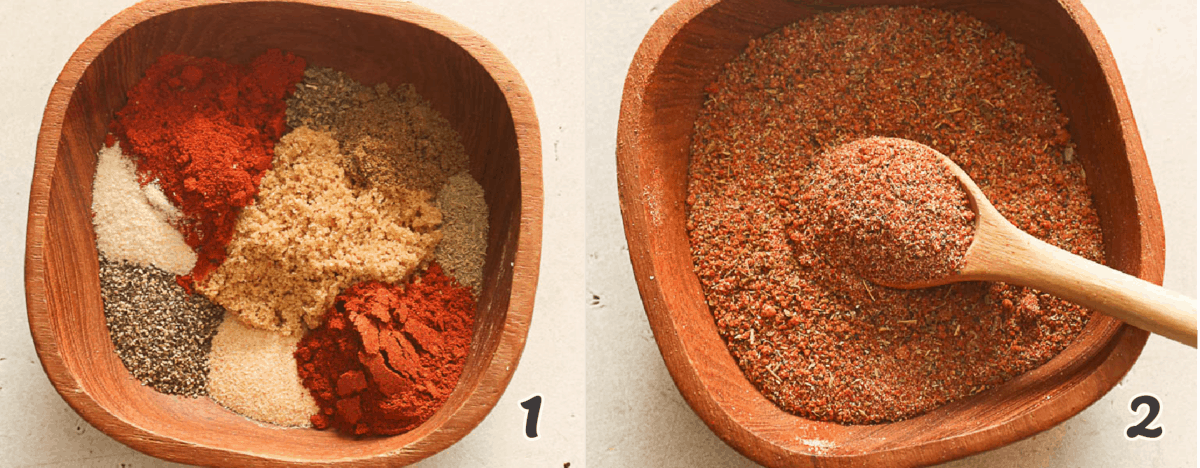
- Seasonings: Combine the spices in a small bowl. (Photos 1-2)
- Prepare: Remove the neck and giblets from the chicken and save them for another recipe. Rinse it inside and out, then pat it dry with paper towels.
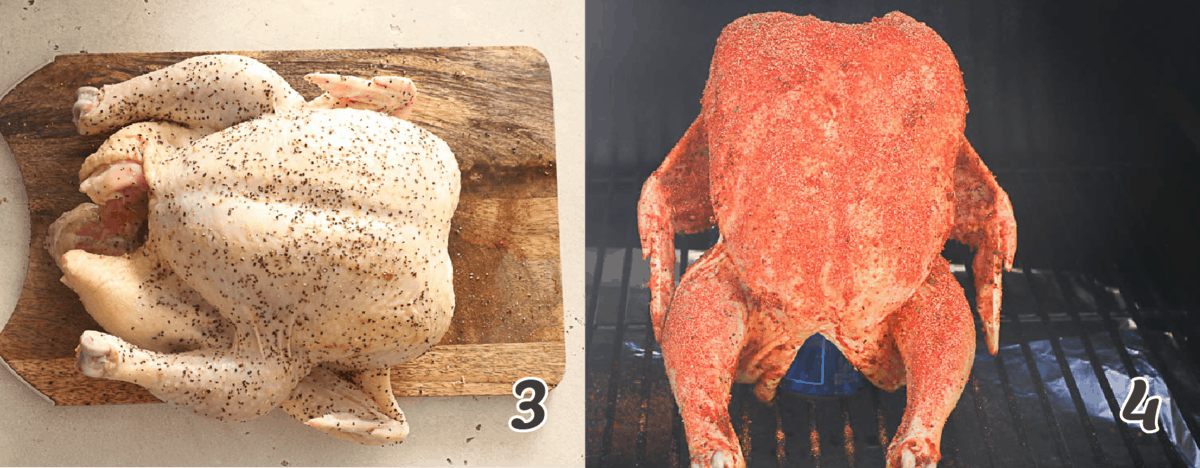
- Rub the chicken inside and out with salt. Generously season it with the spices, then refrigerate until ready to smoke. (Photo 3)
- Beer: Open the beer can and pour half of it into a glass. Enjoy the half in the glass. Stick a sprig of thyme into the beer can if desired.
- Assembly: Place the beer can on a solid surface. Then, gently place the whole chicken over it with the chicken in the upright position.
- Placement: Transfer the chicken with the beer can to the smoker. Then, use the chicken legs to support its body like a tripod, preventing it from falling over. (Photo 4)
- Smoke chicken at 225-250℉ (105-120℃) for 3½-4 hours or until an instant-read thermometer inserted into the thickest part of the thigh registers 165℉ (74℃) in the breast and 180℉ (82℃) in the thigh.
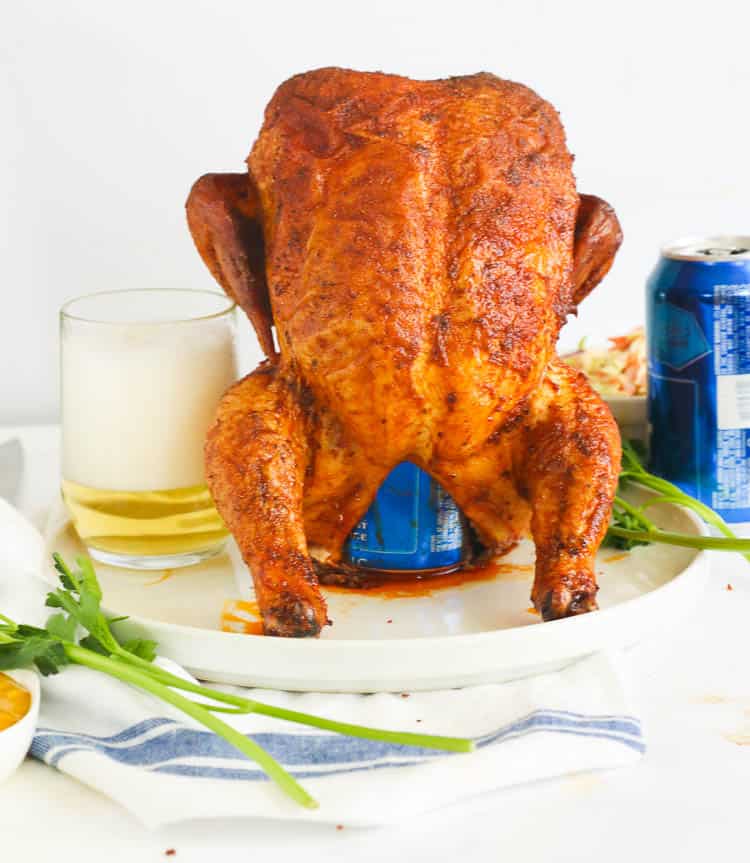
- Rest: Carefully remove the chicken from the smoker. You may need heatproof gloves and another pair of hands for this. Either remove the beer can and serve the chicken on a platter, or serve it standing pretty on the can. Let it rest for 10 minutes before carving. Discard the beer.
Which Smoker to Use
Another opportunity to say whatever you have on hand.
My Choice: Pellet Smoker
Pros
- Ease: Set it and forget it
- Adaptable: Mix and match different wood flavors, and you can usually use either wood chips or pellets
- Indirect heat: Even smoking and no flipping is necessary
- Temperature control: Most grills come with a probe that connects to an app on your phone to let you know when the chicken is ready
Cons
- Bulky: Even a small unit needs to be at least 10 feet from any structures
How to Use It
- Meat: Carefully place the chicken and the beer can on the rack; you may need a second pair of hands to assist with this. The beer takes the place of the water pan
- Close the lid and start smoking
Charcoal Grill
Pros
- Compact: Smaller units fit in the closet or other small space after cooling
- No Electricity: Great for camping and picnics
- Budget-friendly and waaay easier to clean
Con
- Direct heat: The heat source is positioned closer to the meat, which can result in roasting rather than smoking. You’ll want to rotate the chicken occasionally
- Temperature control: It doesn’t usually come with a probe, so you’ll want to keep an eye on it
- Messy: Cleanup isn’t as easy as the other smokers
How to Smoke Chicken With Charcoal
- Light the hot charcoals on the far side of the grill
- Catchment: Add a tin can or metal container below the chicken to catch fat before it starts a fire
- Place the chicken on the other side of the grill farthest from the coals. Make sure it has enough clearance to go in standing up
- Close the lid, but keep an eye on the heat level so your chicken doesn’t cook too fast
Electric Smoker
Pros
- Indirect heat: No open fire means it’s safer than a grill
- Temperature control: The built-in thermometer lets you know the inside temperature
Cons
- More time: It has a lower maximum temperature, so it takes longer. But that could also be a pro
- Sustainability: It does use electricity, so a power outage puts it out of business
How to Use an Electric Smoker
- Prep: Preheat the unit with the woodchips of your choice
- Moisture: Once the smoker reaches the desired temperature, place the water pan at the lowest available spot
- Smoke: Place the chicken on the rack, close the lid or door, and smoke it
NOTE: If you’re using your electric smoker for the first time, rub it with cooking oil to remove manufacturing residue and avoid food sticking
Recipe Tips
- Choose your favorite rub and dry-brine your chicken for 24 hours in the refrigerator
- Let the chicken rest for about 10 minutes after removing it from the smoker, allowing the juices to redistribute
- Season every inch of the chicken for better flavor penetration
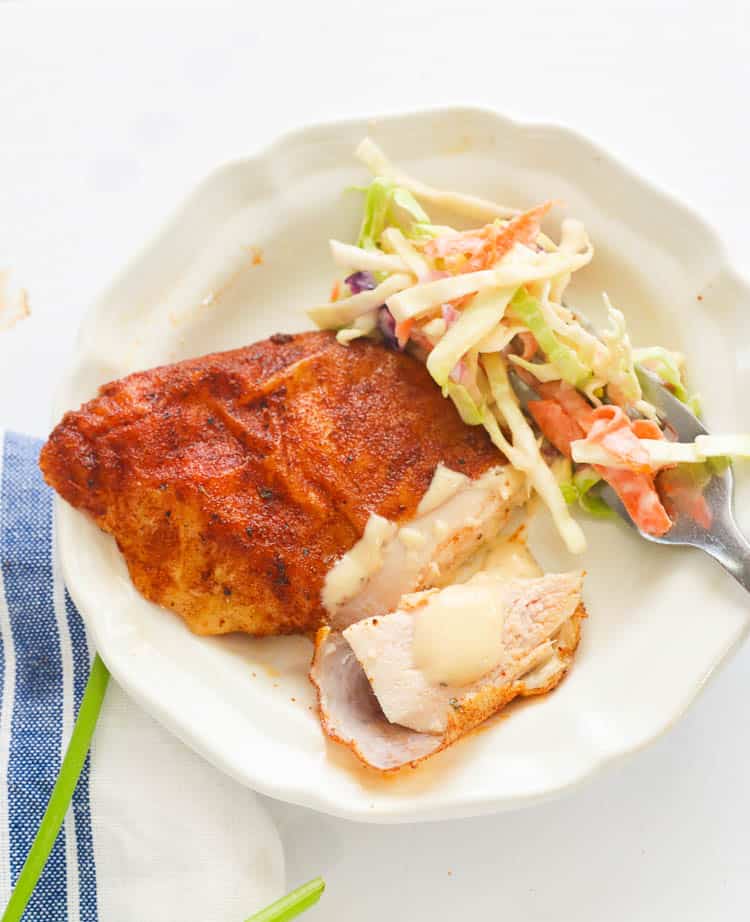
What Goes Well With Smoked Chicken
Remember those giblets you saved? Make giblet gravy! Roasted potatoes and a shaved Brussels sprout salad complete the main course, while a banana bundt cake delivers the perfect finish.
Seasoning Recipes to Try

Smoked Beer Can Chicken
Ingredients
- 1 5-pound (2-3k) whole chicken, bone-in and skin-on
- salt to taste
- 1-2 teaspoons (2-4g) bouillon powder (optional)
- 2 teaspoons (10g) minced garlic minced
- 2 tablespoons (14g) onion powder (or granulated onion)
- 2 tablespoons (5-6g) thyme (or oregano or basil)
- 1 tablespoon (7g) paprika
- 1 teaspoon (2g) white pepper
- 1 can beer, your preference
- oil for basting
Instructions
- In a small bowl, combine spices.
- Remove the giblets from the chicken and reserve them for gravy. Rinse the chicken thoroughly, both inside and out, then pat it dry with paper towels.
- Season it inside and out with salt. Then, generously rub the chicken with the spice combination and refrigerate until ready to cook.
- Open the beer can and pour half of it out into a glass for yourself. Place a sprig of thyme into the half-full beer can if desired.
- Place the beer can on a solid surface. Then, gently place the whole chicken over the beer can with the chicken in the upright position.
- Transfer the chicken and beer can into the smoker. Then, use the chicken legs to support its body, allowing it to act like a tripod and preventing it from falling over.
- Close the lid and smoke the chicken over medium-high heat until cooked through. An instant-read thermometer inserted into the thickest part of the thigh will register 165°F (74℃) in the breast and 180°F (85℃) in the thigh.
- Carefully lift the chicken off the beer can while someone holds it. You may want to gloves for this. Place chicken on a platter or carving board. Let it sit for 10 minutes before carving. Discard the beer.
Tips & Notes:
- Season the chicken, covering every inch inside and out with your favorite blend
- You never know what can happen inside the smoker. So, in case the chicken falls over, having heatproof gloves is a good idea so you can put it back in position
- You can replace the beer with an alcohol-free version, white wine, or ginger ale (or another beverage)
- Please remember that the nutritional information is a rough estimate and can vary significantly based on the products used in the recipe