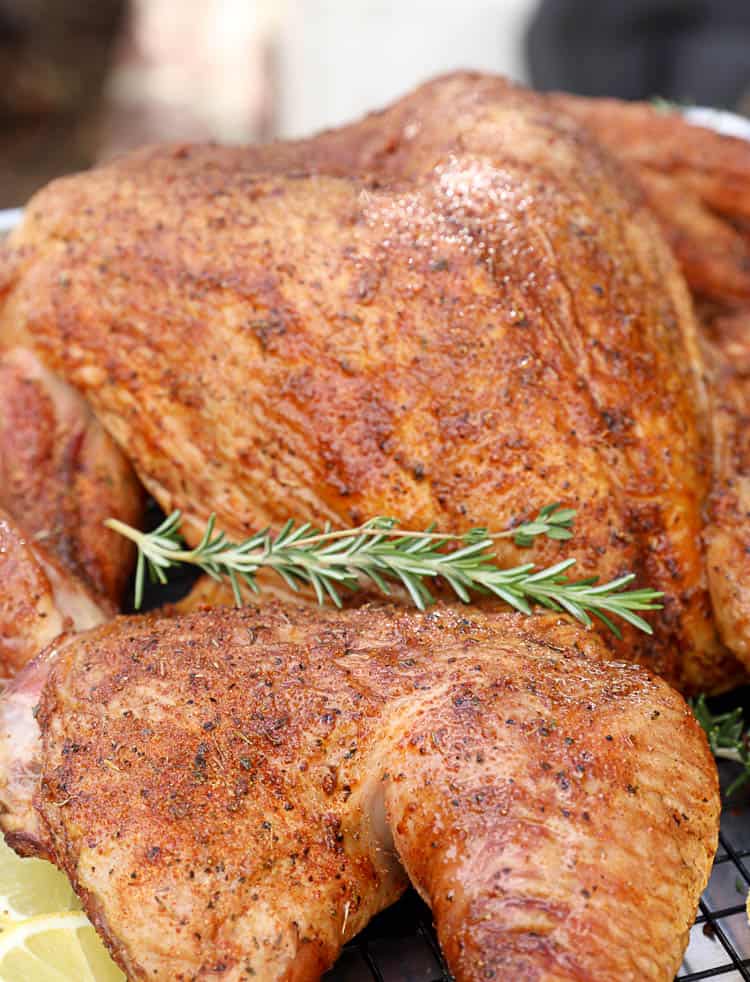
Smoked Spatchcock Turkey
Smoked spatchcock turkey delivers fall-off-the-bone goodness with flavorful juiciness in every bite. Simple smoking delivers flavor penetrating deep into your holiday bird without drying it out. This is your go-to guide for a deliciously tender and juicy turkey that’s perfect any time of year!
Turkey is definitely one of my favorite special occasion creations. It’s what I love most about the holidays, after seeing my family, of course. What’s funny is that even though it’s not the holidays, my friends keep requesting my smoked recipe. Your wish is my command!
I’m excited to share my super-easy guide on spatchcocking a turkey so you can do it at home. Trust me, you don’t need advanced cooking skills to make this mouthwatering dish. All you need is a little patience!
Why Spatchcock a Turkey for Smoking
First, spatchcocking speeds up the smoking time because the heat can quickly cook the whole poultry. Whether baking, grilling, or smoking, whatever you season it with penetrates better. And if you grill or smoke it, the turkey benefits by having a more delicious smokiness all the way to the bone.
How to Spatchcock and Smoke a Turkey
Spatchcock the Turkey
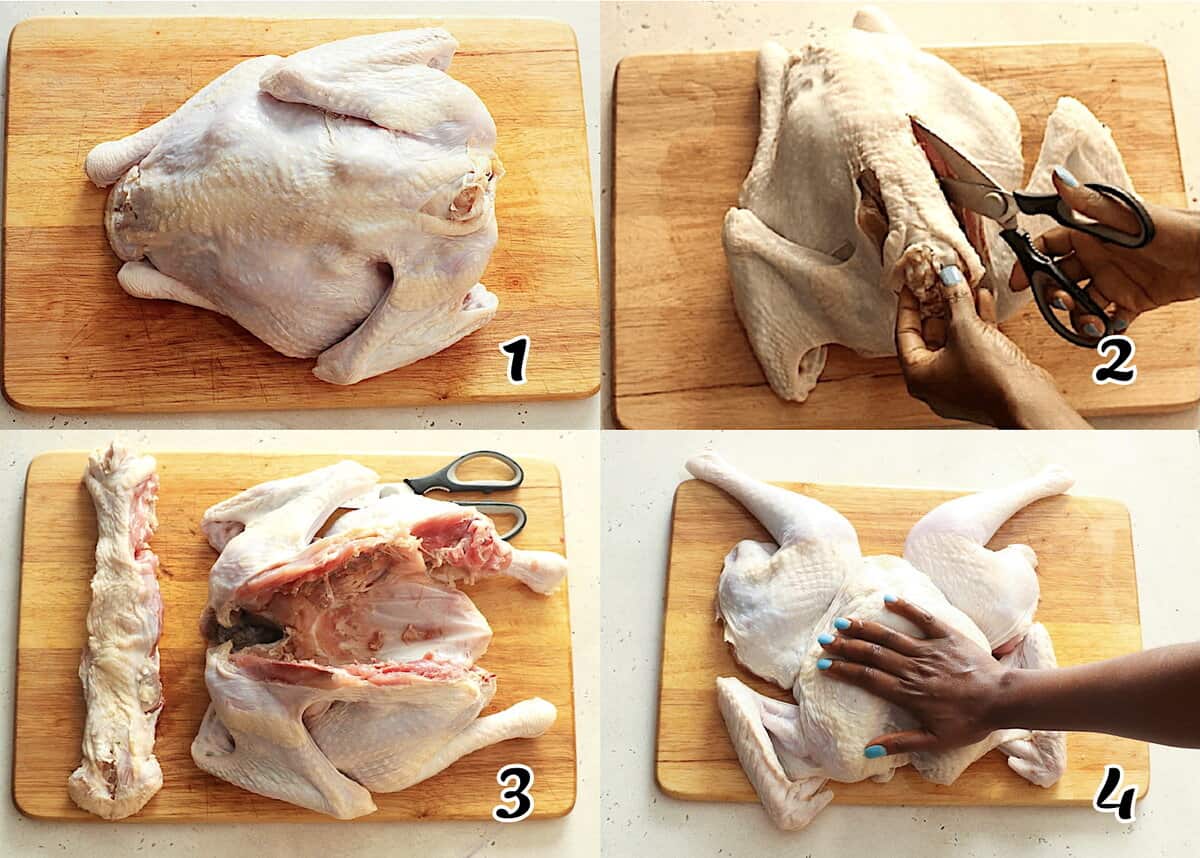
- Clean – Remove the neck and giblets. Place the turkey breast side down on a cutting board.
- Remove the Backbone – Use kitchen shears or a sharp knife to cut the left side of the backbone from the tail to the neck. Do the same to the right side of the backbone, and then remove it. (Photos 1-3)
- Flatten the turkey. Flip the turkey over, breast side up, and press on it to break the bone. Then, flatten the wings using both hands. (Photo 4)
Smoke the Spatchcocked Turkey
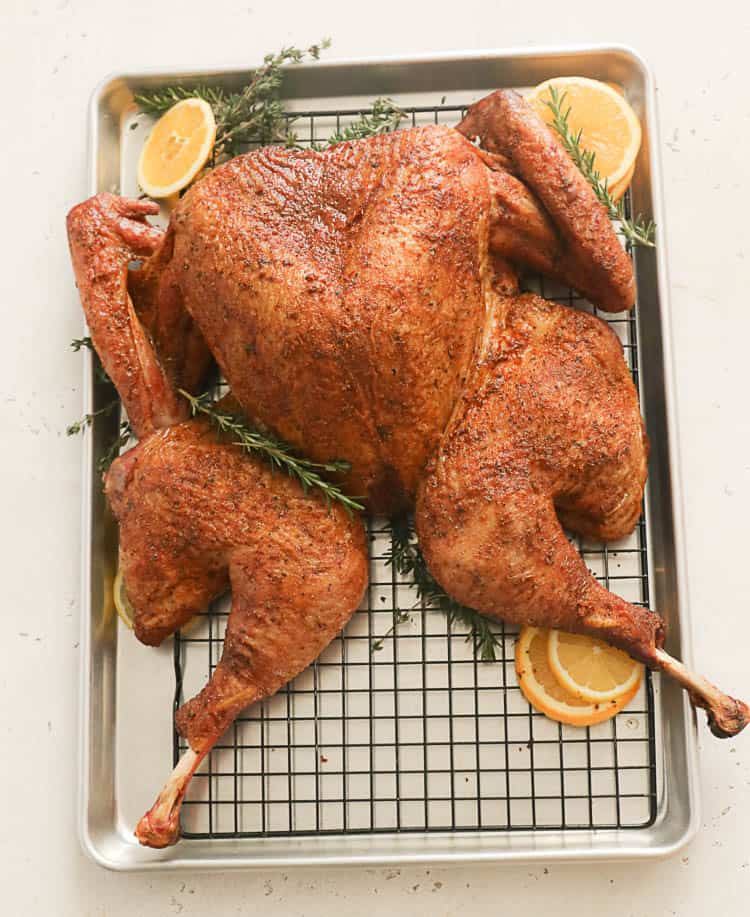
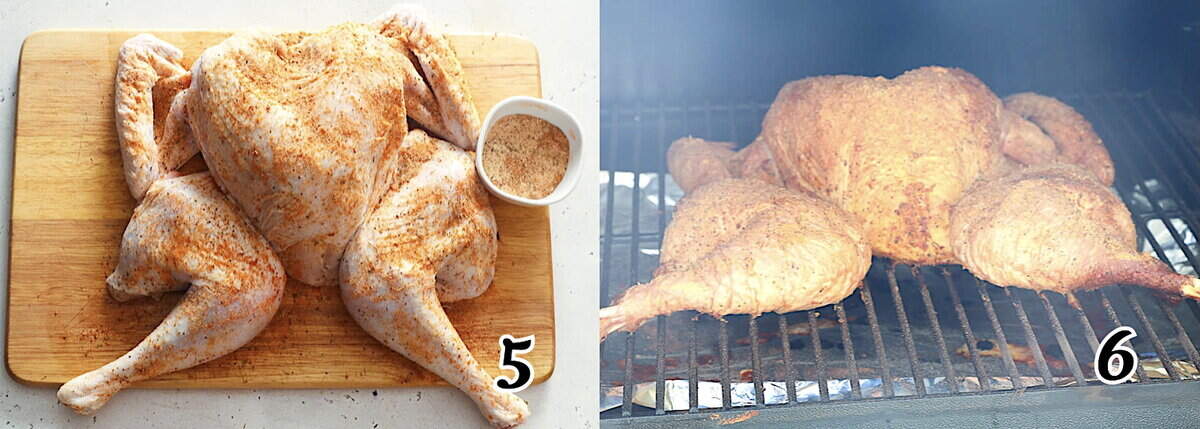
- Season – Rinse and pat the turkey dry with paper towels. Rub your choice of seasoning and kosher salt all over the bird, both sides. (Photo 5)
- Preheat the smoker to 250-275℉ (120-135℃). The higher the temperature, the faster the turkey will cook.
- Start Smoking – Place the turkey in the smoker and brush it with oil every 1-2 hours. Smoke until the turkey’s thickest part reaches an internal temperature of 165℉ (75℃). (Photo 6)
- Rotate – Turn the turkey around halfway through for even browning, although this is unnecessary.
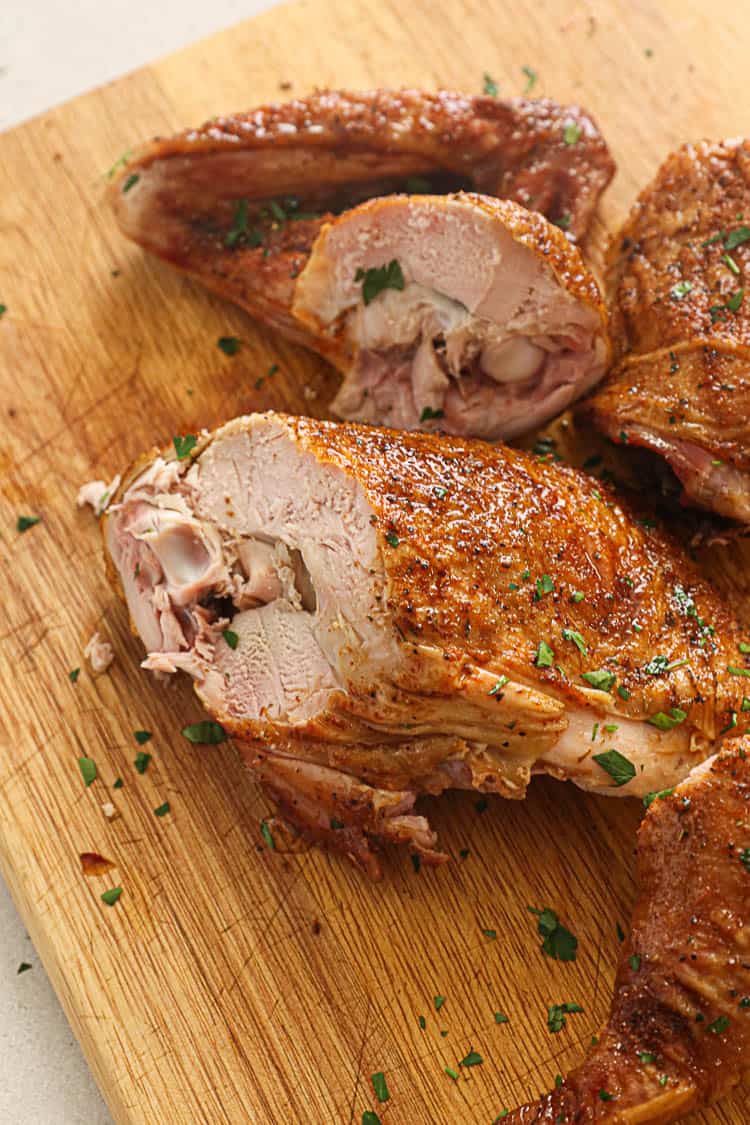
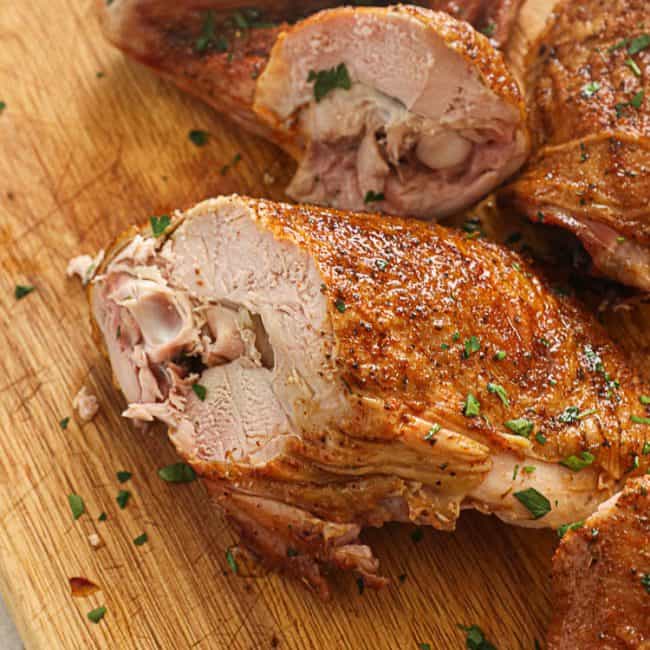
- Serve – Remove the turkey from the smoker and let it sit, covered with foil, for 10 minutes before serving.
Recipe Variations & Tips
- Homemade Creole seasoning spices up the turkey, giving you a well-flavored holiday dinner.
- Poultry seasoning blends perfectly complement the turkey and smoky goodness. Homemade poultry seasoning is even better.
- Place veggies under the turkey on a baking sheet. As it smokes, turkey drippings will flavor the smoking veggies.
- If cutting the backbone is too hard, try cutting it a little farther from or closer to the bone. Or move it around to find the thinnest part.
- Only open the smoker’s lid when necessary. Constantly opening it will cool the smoker, which could lead to longer cooking times.
- Stuffing a turkey for smoking could cause food poisoning. Make the stuffing separately and serve it on the side. You could also put it in the smoker 30 minutes before the turkey finishes for a smoky stuffing.
How Long to Smoke a Spatchcocked Turkey
A spatchcocked turkey takes less time to smoke than a regular turkey. While a whole turkey takes 25-30 minutes per pound to smoke at 225-250°F (108-120℃), a spatchcocked turkey takes 11-13 minutes per pound at 225-275°F (108-135℃).
Smoke your turkey until an instant-read meat thermometer reads 160℉ (72℃) in the thickest part of the breast. The thigh should read 180℉ (82℃). The turkey leg should move easily when ready to remove it from the smoker.
For crispier skin, dry it well and smoke it at a higher temperature; 350℉ (180℃) is ideal.
What to Serve With Smoked Spatchcock Turkey
Holiday classics go best with this smoked goodness. Green bean casserole, garlic mashed red potatoes or cornbread dressing, and homemade cranberry sauce deliver a complete meal. Finish it off with pecan or sweet potato pie, and you’re good to go.
More Amazing Smoked Turkey Recipes to Try
By Imma
This blog post was originally published in October 2021 and has been updated with additional tips and beautiful photos.
Smoked Spatchcock Turkey
Ingredients
Instructions
- Remove the giblet package. Then cut the left side of the backbone from the tail to the neck with kitchen shears or a sharp boning knife. Do the same to the right side of the backbone. Flip the turkey over and press on it to break the breast bone and flatten the wings using both hands.
- Rub the turkey with your choice of seasoning all over and on both sides.
- Preheat the smoker to 250-275℉ (120-135℃). The higher the temperature, the faster the turkey will cook.
- Place the turkey in the smoker and brush it every 1-2 hours with its juices or broth. Flip the turkey halfway through for even browning if desired.
- Smoke until the internal temperature of the thickest part reaches 165℉ (73℃).
- Remove the turkey from the smoker and allow it to rest, covered with foil, for 10 minutes before serving.
Tips & Notes:
- Rinsing your poultry is a personal decision. I prefer clean meat and don’t mind disinfecting my kitchen and tools afterward.
- Brining isn’t necessary because the rub will give it flavor, and smoking will give you juicy, tender meat.
- Smoke your turkey until an instant-read meat thermometer reads 160℉ (72℃) in the thickest part of the breast. Ten minutes of resting should bring it up to the FDA recommendation of 165℉ (74℃). The thigh should read 180℉ (82℃). The turkey leg should move easily when ready to remove it from the smoker.
- Make sure your meat thermometer doesn’t touch the bone. Inserting it at a 90-degree angle gives a better measurement. Sometimes, I measure in more than one spot to make double sure.
- You can spatchcock a chicken and smoke it; just reduce the smoking time to 3-4 hours at 275℉ (135℃).
- The turkey will be much juicier if you let it rest for 10 minutes before carving.
- Please keep in mind that the nutritional information is a rough estimate and can vary significantly based on the products used in the recipe.


Awesome!
Awesome recipe. Thanks so much for sharing!