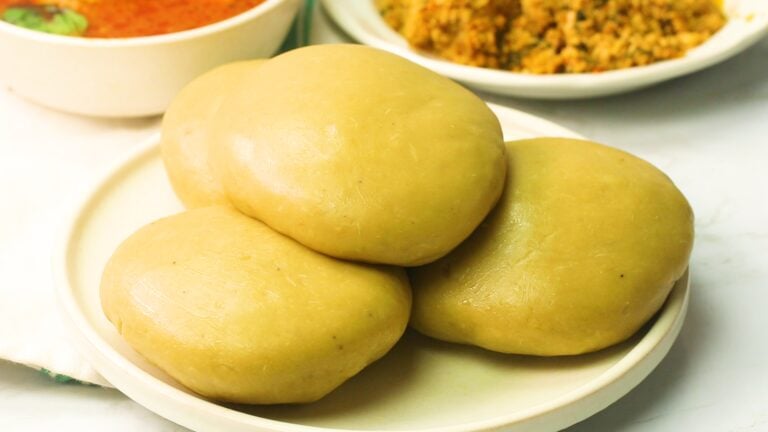
Chapati Recipe
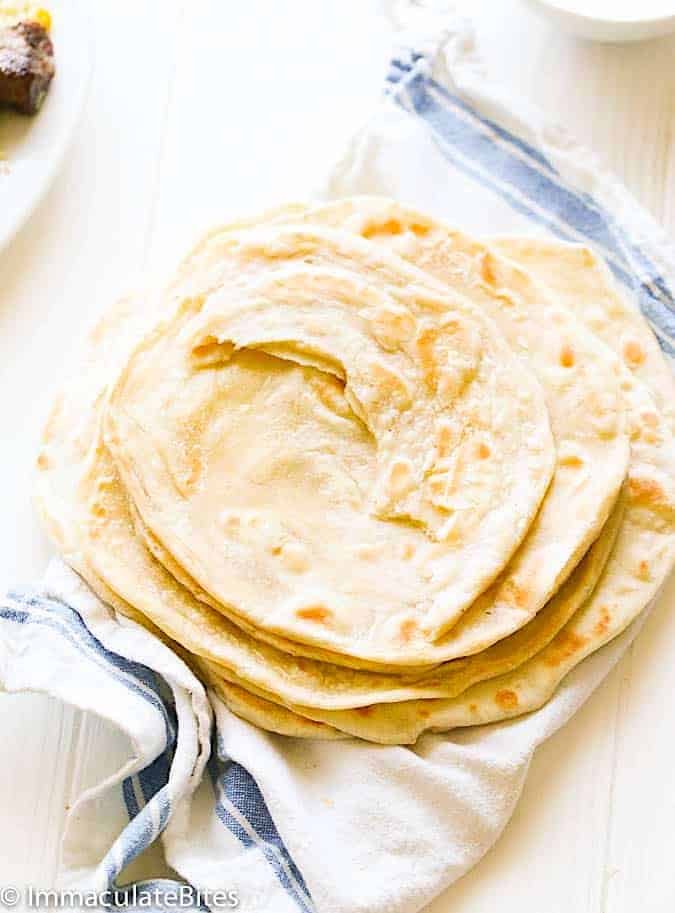
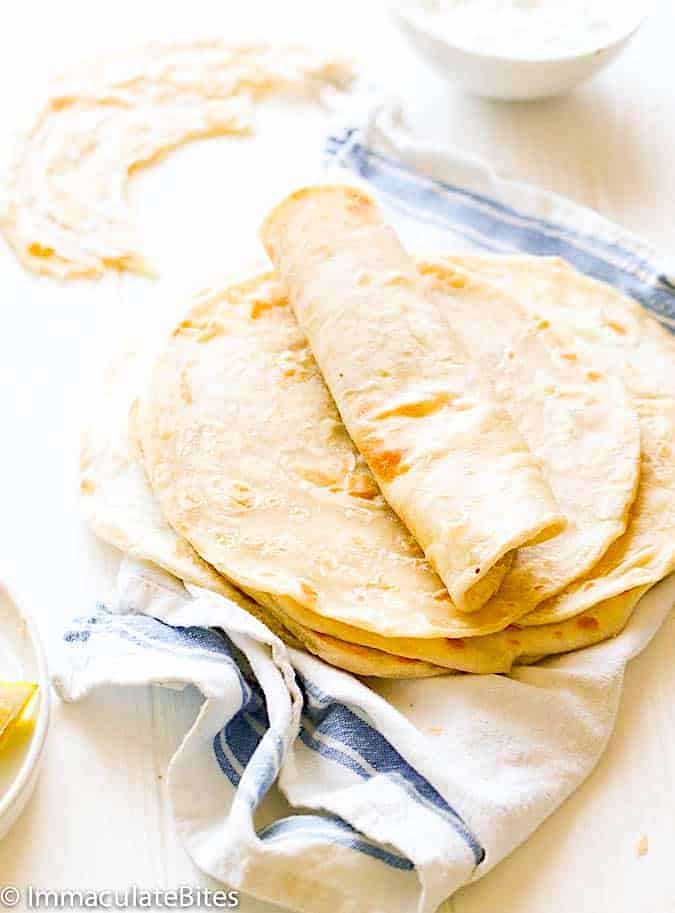
Flaky, layered, and super satisfying East African chapati with only five simple ingredients tastes way better than store-bought. The mild, nutty flavor is ideal for beef stew and other meat or veggie dishes. And what better way to relieve stress than kneading bread?
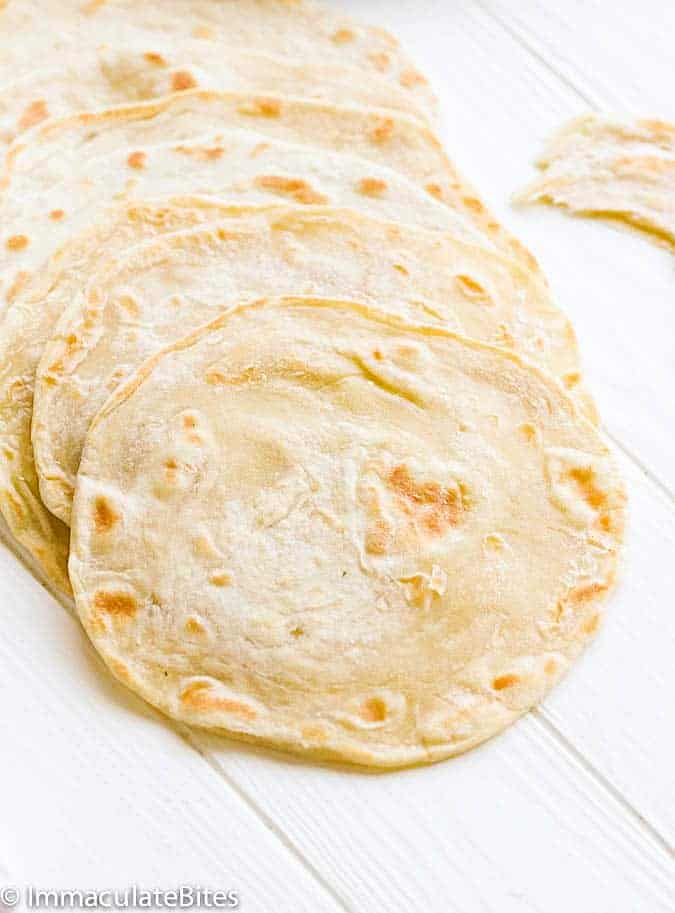
This delightful flatbread is super simple to throw together with just five ingredients and a little patience. Rolling and coiling the dough for a flaky flatbread is so worth the little time it takes. And it’s a must-have side for any East African dish.
I love kneading bread dough because it’s so relaxing. Plus, it develops the gluten for that satisfying chew we enjoy with flatbreads. Then the coil makes it light and flaky, and brushing the outer layers with oil gives it a delicately crispy edge.
Where Does Chapati Come From?
If you’ve tried East African food, especially from Tanzania, Uganda, Mozambique, Kenya, and Burundi, you are familiar with the unleavened pan-grilled bread—chapati. It’s different from Indian chapati because it’s coiled and also enjoys the deliciousness of either ghee or oil. Most say it was born in Egypt and has been in the East African culinary heritage for millennia.
How to Make Chapati
- Make the dough, knead it, let it rest, then divide it into 6-8 balls.
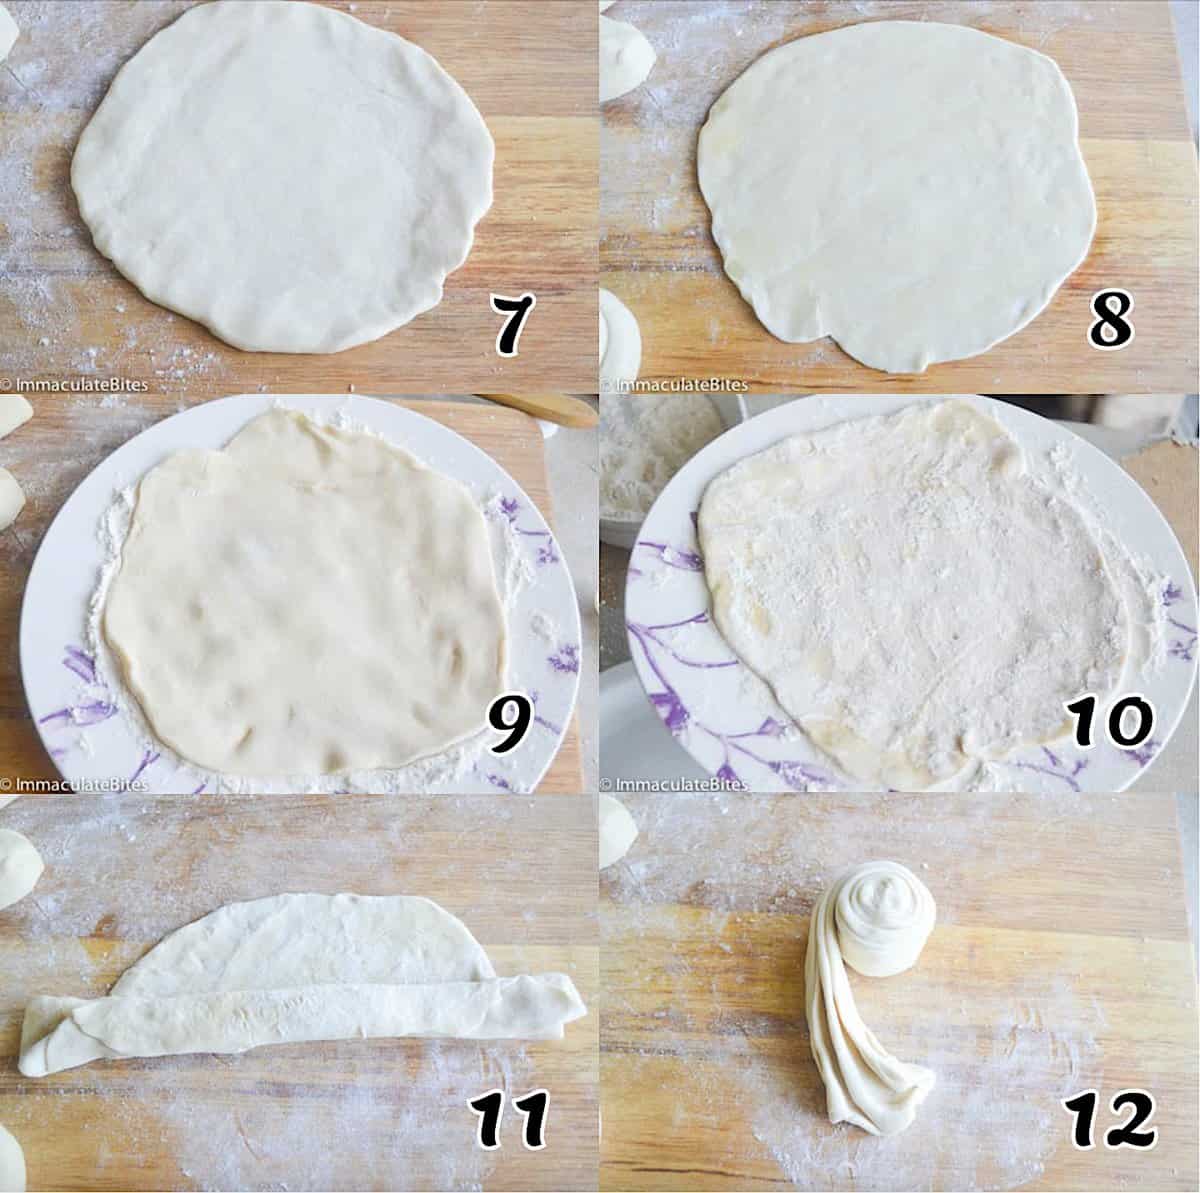
- Roll the balls into circles and dust them with flour so they don’t stick together. Fold them like a fan, then coil them.
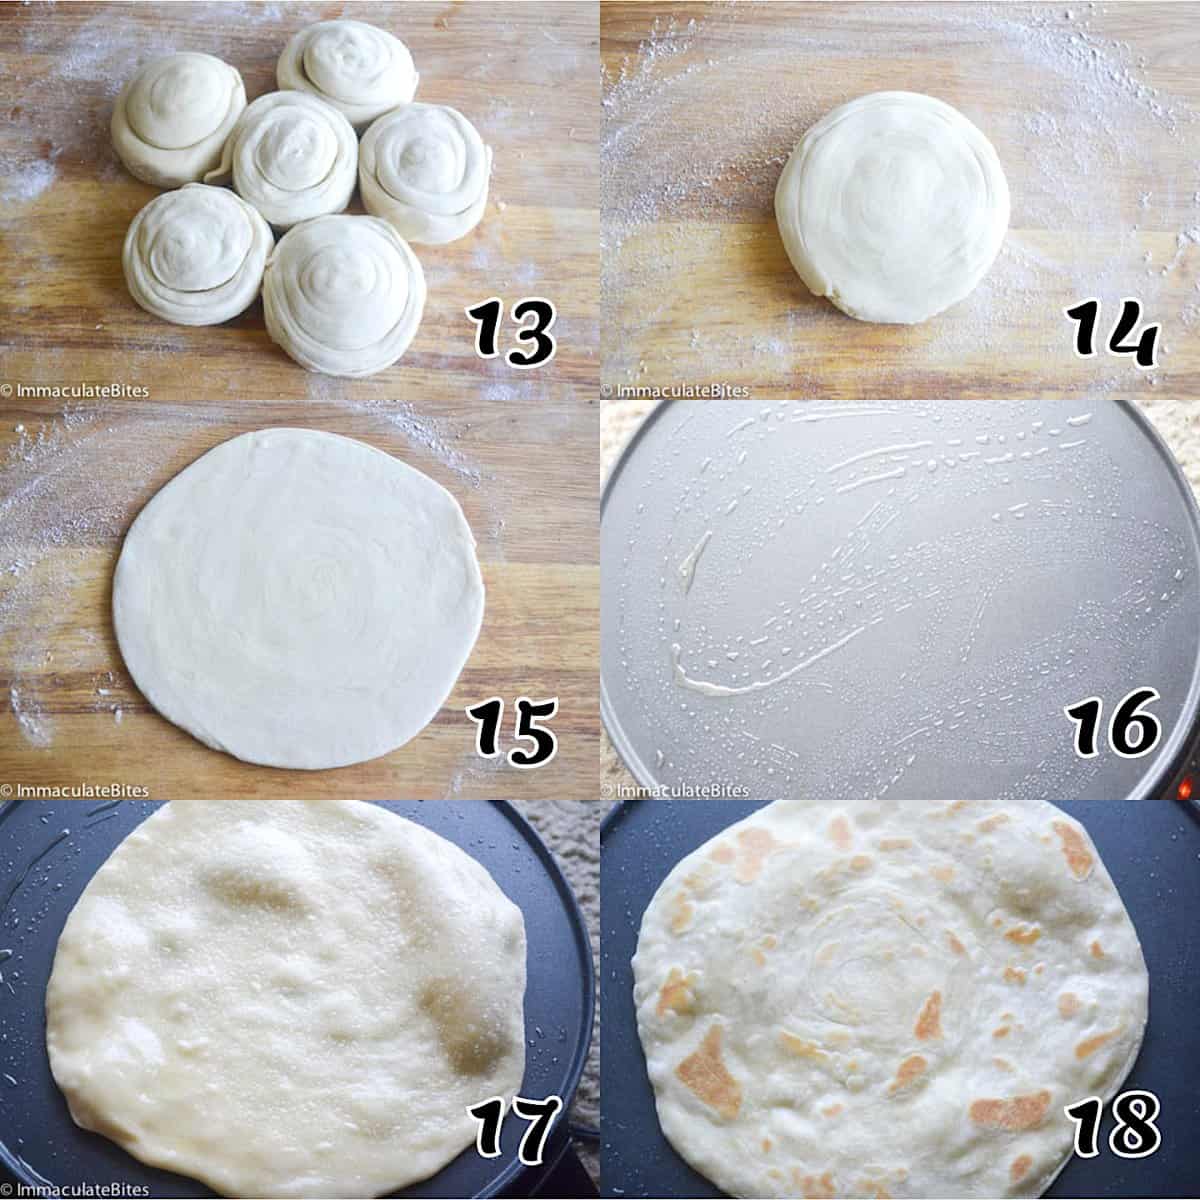
- Roll the coiled balls back into a circle and cook on an oiled griddle.
Recipe Twists and Tips
- You can add grated veggies, such as carrots, squash, and potatoes, to the dough, like in Kenyan chapatis or vegetable omelets in Uganda.
- Use a 50/50 water-to-milk ratio to make softer flatbreads.
- A non-stick pan helps prevent the bread from sticking and burning.
Make-Ahead and Storage Instructions
You can make the dough ahead, transfer it to a covered bowl, and refrigerate it for 24 hours. Allow it to rest at room temperature for an hour before rolling it into individual chapatis.
Or you can freeze the raw dough or chapatis for three months. Allow the dough to thaw and come to room temperature before cooking.
Flatbread keeps in the fridge for up to a week or in the freezer for 3-4 months. Heat them in a hot skillet for 30 seconds or wrap them in a paper towel and zap them in the microwave on medium-low for a few seconds, but the skillet is better.
Mouthwatering Recipes You Can Use With Chapati
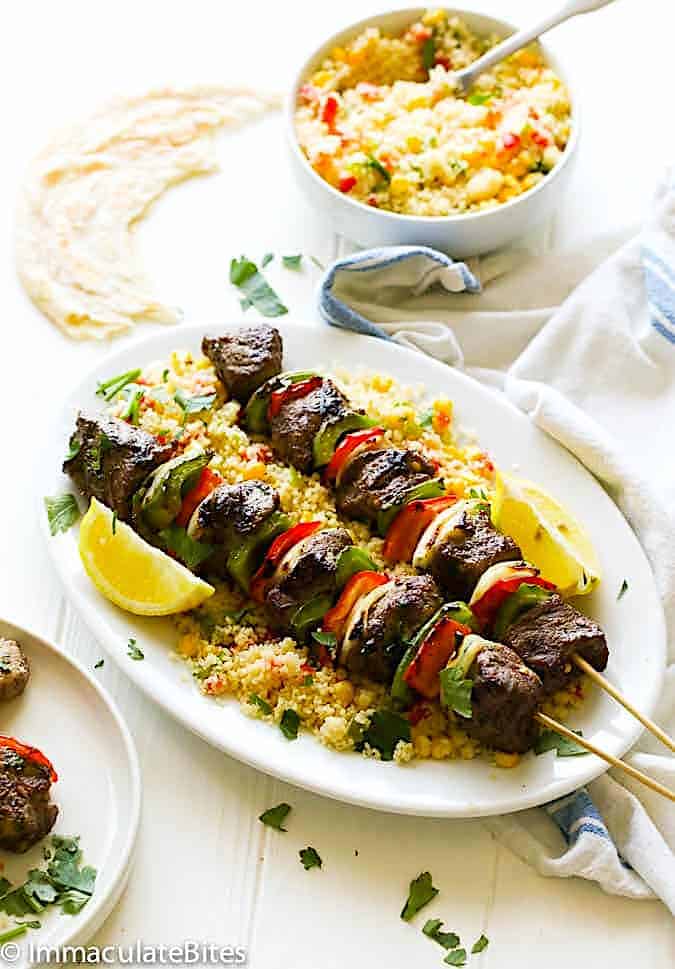
Dip chapati in curry sauce or make a steak wrap sandwich for more deliciousness. Curry channa and aloo, African peanut stew, ground beef curry, Jamaican curry goat, and crockpot beef tips & rice are great choices.
More Comforting Flatbread Recipes to Try
Watch How to Make It
[adthrive-in-post-video-player video-id=”1m5Y3sEi” upload-date=”2019-04-01T06:51:26.000Z” name=”East African Chapati” description=”East African Chapati- Easy to make chapati that are Flaky, layered and Delicious. Made with a few simple ingredients.”]
This blog post was originally published in June 2014 and has been updated with additional tips, new photos, and a video.

Chapati Recipe
Ingredients
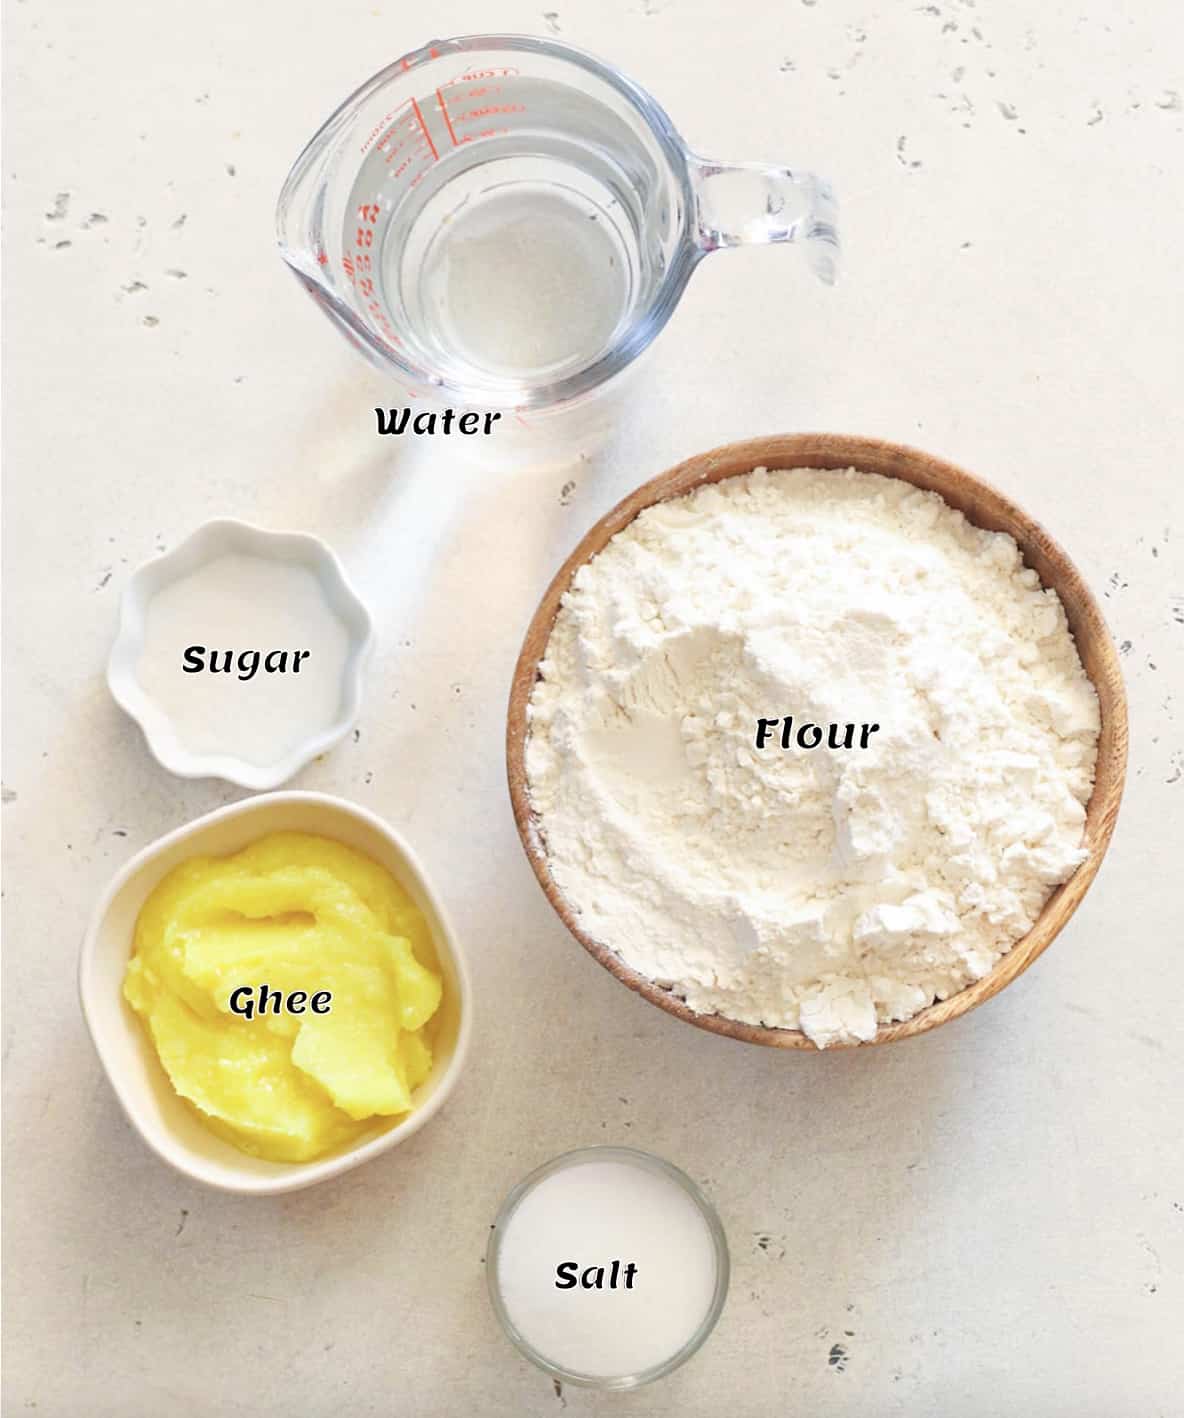
- 3 cups (360g) all-purpose flour
- 1 teaspoon (4g) sugar
- 1½ teaspoons (7-8g) salt
- 3 tablespoons (42g) ghee (clarified butter or oil)
- 1¼ cup (295ml) warm water
Instructions
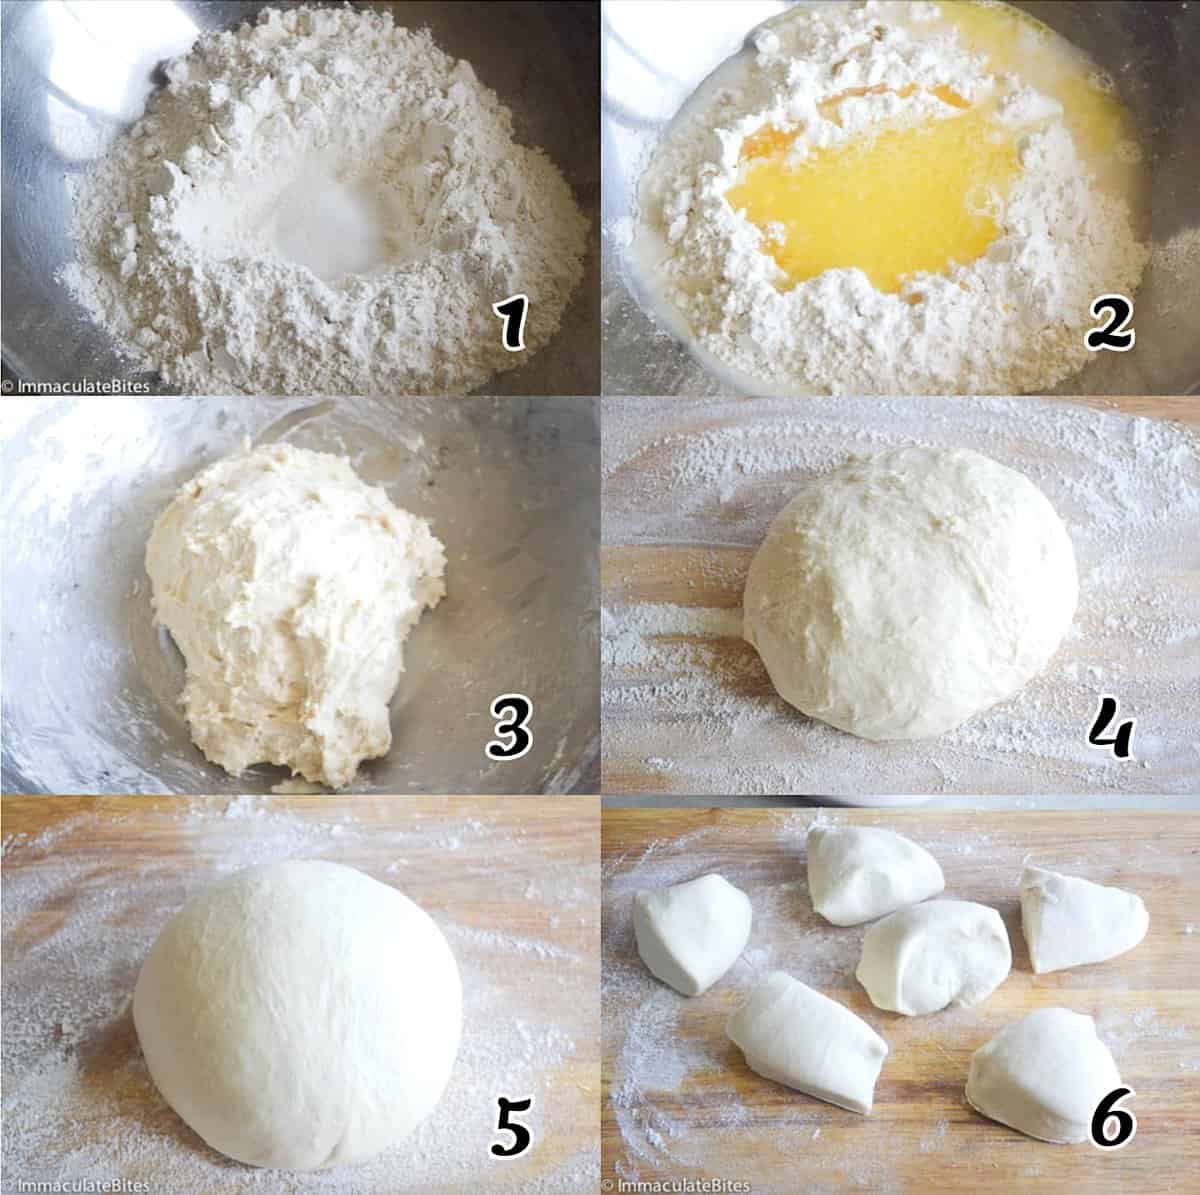
- In a large bowl, add flour and make a well, then add sugar and salt, followed by water and ghee or oil.
- Knead to form a soft and sticky dough.
- Place dough on a heavily floured board and knead for 8-14 minutes. Continue to flour dough as needed to facilitate kneading. Be careful not to overdo it. The dough should be soft, elastic, and smooth.
- Divide dough into 6 or 8 pieces according to preference and let it rest. Resting helps to relax the gluten and makes it not only easier to work with but also produces tender chapati.
- Using a rolling pin, roll out the dough balls into a circle. They don't have to be perfect.
- At this stage, you may cook them. However, if you want chapatis with layers, follow the next steps.
- Lightly oil chapati dough with ghee. Be gentle.
- Then place the dough on a heavily floured plate, and press the dough down.
- Turn it over and press down again – lightly shake off excess flour.
- Shape dough like you would shape a paper fan – starting at one end and folding all the way to the opposite end.
- Then coil it up – like in the picture.
- When all the dough circles have been coiled, cover them with a damp cloth and let them rest for 20 minutes.
- Gently flatten each coiled ball and roll it out. Begin rolling from the center, working outwards.
- Rotate the dough out each time you roll it. That helps to make a perfect circle. Make sure they are not rolled out too thin. Chapatis are not meant to be thin – a ¼-inch thickness is good.
- Oil the pan. Then place the chapati on it. I used a crepe pan, but a skillet works just as well.
- Heavily oil the other side of the dough, making sure you oil the edges too.
- Cook for 2-3 minutes, rotating as needed until golden brown. Serve warm.
Tips & Notes:
- The right amount of kneading is crucial. Gluten won’t develop well without it, changing the texture. Also, oil makes the chapati soft and prevents it from drying out.
- Lukewarm water creates a smoother, more supple dough, but remember to add it gradually so the dough doesn’t get too wet.
- Resting time is also essential since it makes the dough easier to roll without breaking apart.
- Please remember that the nutritional information is a rough estimate and can vary significantly based on the products used in the recipe.


Thanks for this recipe! I wanted to make a Ugandan-style rolex, and am so glad I finally figured out how to make the chapati layered like that. Such a cool technique. It was a pretty easy recipe too, made it on my lunch break and wasn’t even late to work!
Thanks, and everything on your site is so beautiful and interesting! I can’t wait to try more stuff!
Awesome! Making it during your lunch break…you go girl. Thanks for taking the time to share your thoughts.
This recipe is so much easier then the ones i’ve tried before, just one question 🙂
Is it okay for the dough to rest overnight? I want to make the dough the evening before so that i don’t have to much work the next day.
I don’t see why not. You will have to bring it to room temperature before rolling it out. Do let me know how it works out for you. Thanks
These were fabulous!! I watched a friend in Tanzania make chapati and this was very similar, except that she didn’t add sugar or do the fan element. In any event, these were delicious and perhaps even flakier! 🙂
Awesome!!!Yes, sugar is optional. Glad to hear it worked out well for you.
Made this to go with your Trinidad Chicken Roti. Your instructions and recipe were so clear and easy to follow. I did the coiling method and they turned out so well. Thank you!
AWESOME! Glad the coiling went well.
Thanks Imma, for the delicious recipe. Can I freeze the dough? Please advise.
I freeze a lot of dough, but have never tried freezing this one. Don’t think it would be a problem though. Making sure it is completely thawed before using. Do let me know if it works out for you. Thanks
I freezed the dough and it went wery well. This recipe is absolutely amazing!
Thank you so much !
We are heading to Nairobi this September and are serving Chapatiis at a fund raiser supper. Can we make and cook these a few days ahead and reheat?
It’s best the day of.It dries up. Have a Safe and Fun Trip.
wow…almost like our ‘roti canai’ here in Malaysia
Yes, almost alike.
thx.loved it.though the 11 small spoons of salt didnt work for me.had to mix other flour for the 1st one was bitter.
So sorry to hear it turned out bitter, it’s meant to be 1 1/2 teaspoons.
Can I use regular cooking oil like canola?
Yes, you can.
hey this recipe was great i love my chapati
Thanks Miriam
You’re the best at making chapatis …well done girl 🙂
Aww Thanks Fareeda, that’s so sweet of you to say that!
I made these yesterday and they turned out great. They were so good. I plan to make these everyday this week for the Feast of Unleavened Bread. Thank you so much for this recipe.
Hi Nicole, thanks for the feedback -glad you enjoyed it.
Ooh my the best chapatis ever… Thanks for the recipe, my chapatis came out soft and and taste. I am busy bragging to my firiend how i know how to make chapatis now, thanks to you @ImmaculateBites all this time i have been buying chapatis in supermarket (NOT ANYMORE). I am so happy and excited 🙂
You go girl! Glad it worked out well for you!
So happy it was a hit with your family and thanks for the feedback!
Hi ! I just got done reading your AD .
They look delicious ..I just HOPE my chapati come out very tasty .as
Everyone eles did ….thank you for taking time to share with everyone this
Recipe …
Tresa,I did not place an AD. May I know where you saw it? Thanks for taking the time to comment – I promise yours will taste just as delicious as everyone’s else.
Thanks so much. A lovely easy to follow recipie and clear process from the photographs. Dont be afraid to give it a go its easy and works well (though i would say 1/4 inch is too thick….the pictures appear to show no more than 1/8th inch.)
My wife previously lived in tanzania and loved this recepie. It brought back many memories.
Hi Greg, thanks for taking the time to comment and provide feedback, really appreciate it.Glad your wife enjoyed it.
They came out perfect. Thanks for sharing this recipe. Now my family can enjoy quality chapatis.
In Kenya I never witnessed anyone use oil or ghee to cook their chapatis, only solid yellow vegetable fat.I suspect this, along with the circle method you mention, is what makes Kenyan chapatis taste and feel so different to Indian chapatis. The Kenyan ones are MUCH NICER in my experience, as they’re wonderfully soft, puffy and chewy.
I’m Kenyan, I’ve always used ghee…
Thanks for sharing !!!
Oh, and I omitted the sugar.
Yes. I made some today. Too bad I cant share a picture. It was very tasty!!
It’ll be perfect with a cup of chai in the morning
Joyce, it sure is. Thanks for the feedback!
Immaculate, many thanks for the recipe!! I followed your recipe and my family is totally in love!! The chapati reminded me of my mama’s cooking in Ukambani, Kenya!
Thanks for sharing!!
Ngina
Ngina,Glad it was a hit with your family
This chapati came out perfect! The taste is spot on. Thanks for the recipe. Now I have to try your mandazi