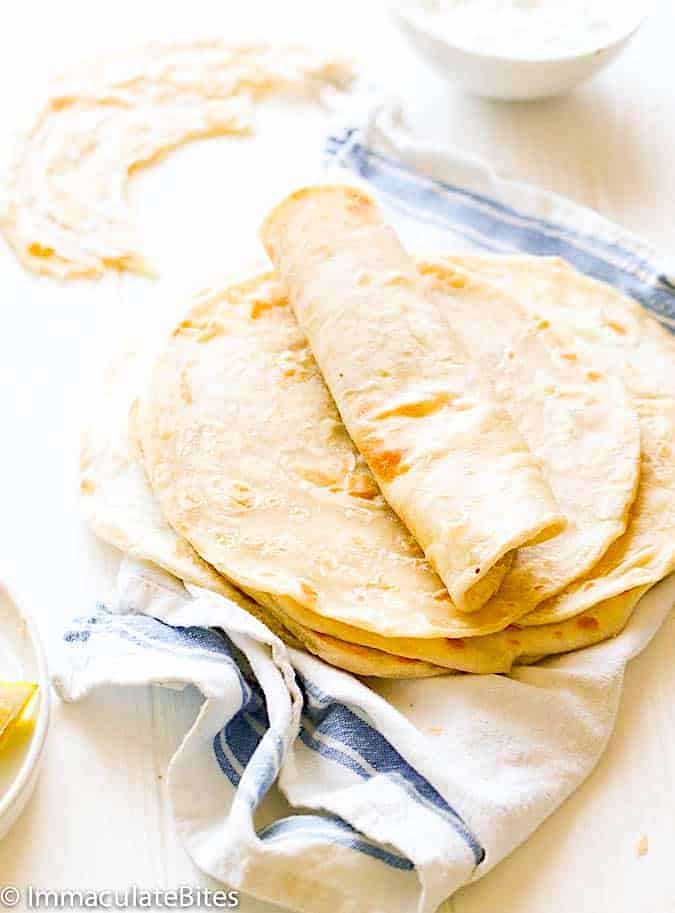
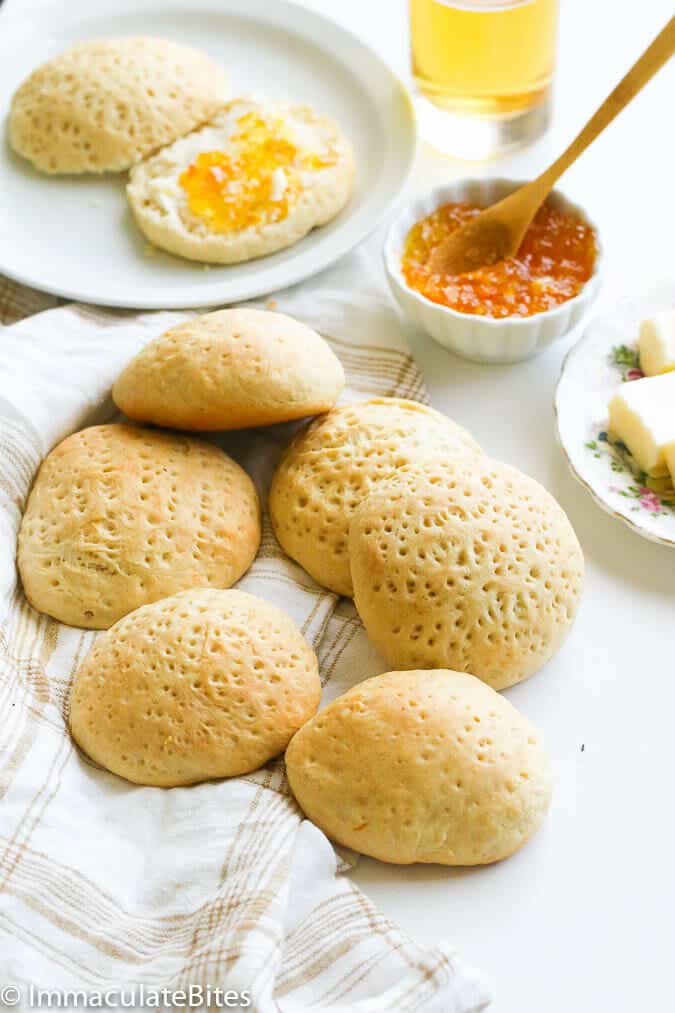
Chapati Recipe
Flaky, layered, and super satisfying East African chapati with only five simple ingredients tastes way better than store-bought. The mild, nutty flavor is ideal for beef stew and other meat or veggie dishes. And what better way to relieve stress than kneading bread?
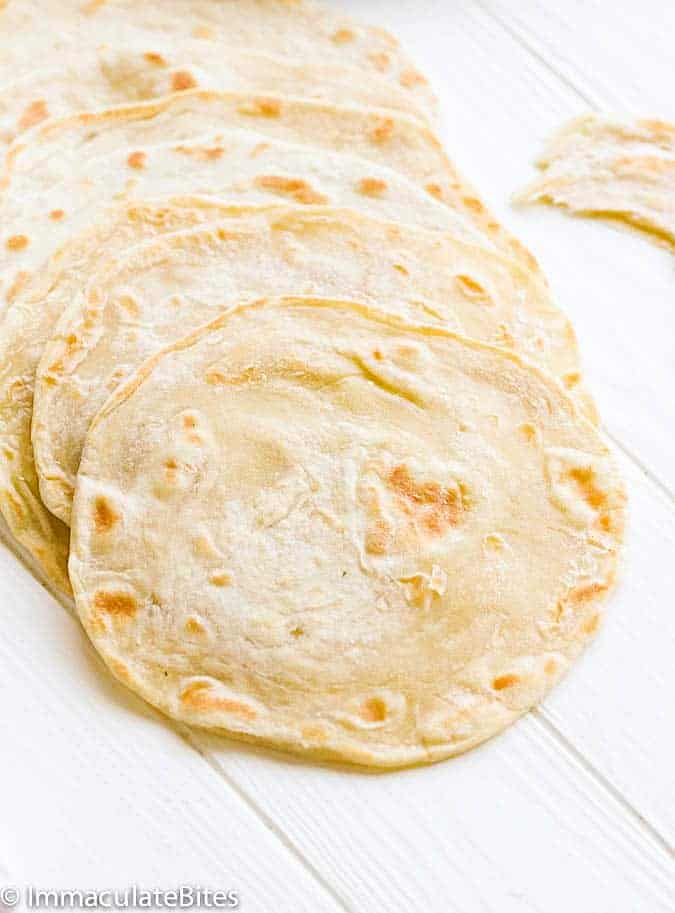
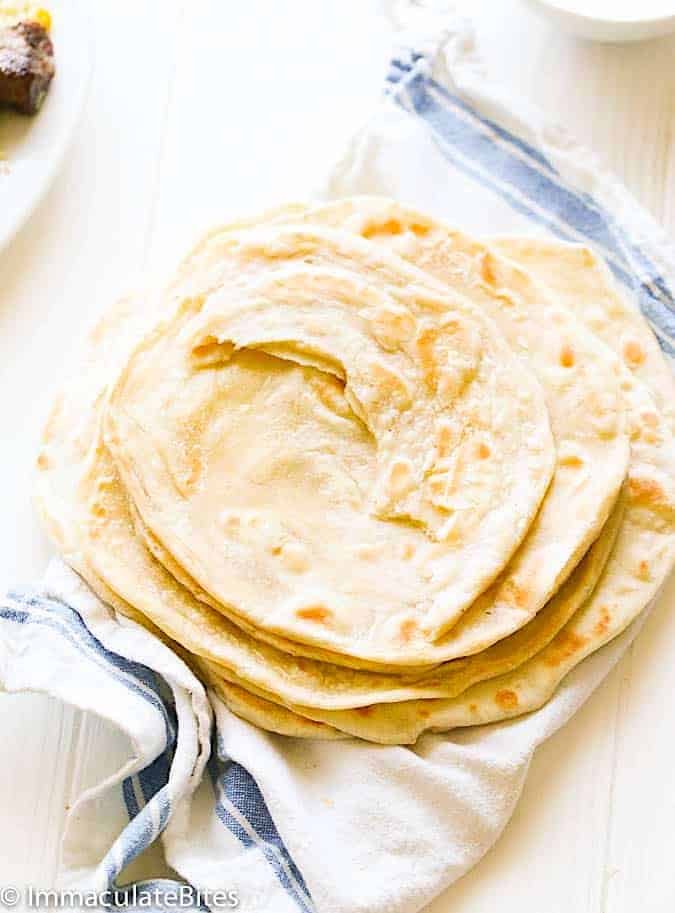
This delightful flatbread is super simple to throw together with just five ingredients and a little patience. Rolling and coiling the dough for a flaky flatbread is so worth the little time it takes. And it’s a must-have side for any East African dish.
I love kneading bread dough because it’s so relaxing. Plus, it develops the gluten for that satisfying chew we enjoy with flatbreads. Then the coil makes it light and flaky, and brushing the outer layers with oil gives it a delicately crispy edge.
Where Does Chapati Come From?
If you’ve tried East African food, especially from Tanzania, Uganda, Mozambique, Kenya, and Burundi, you are familiar with the unleavened pan-grilled bread—chapati. It’s different from Indian chapati because it’s coiled and also enjoys the deliciousness of either ghee or oil. Most say it was born in Egypt and has been in the East African culinary heritage for millennia.
How to Make Chapati
- Make the dough, knead it, let it rest, then divide it into 6-8 balls.
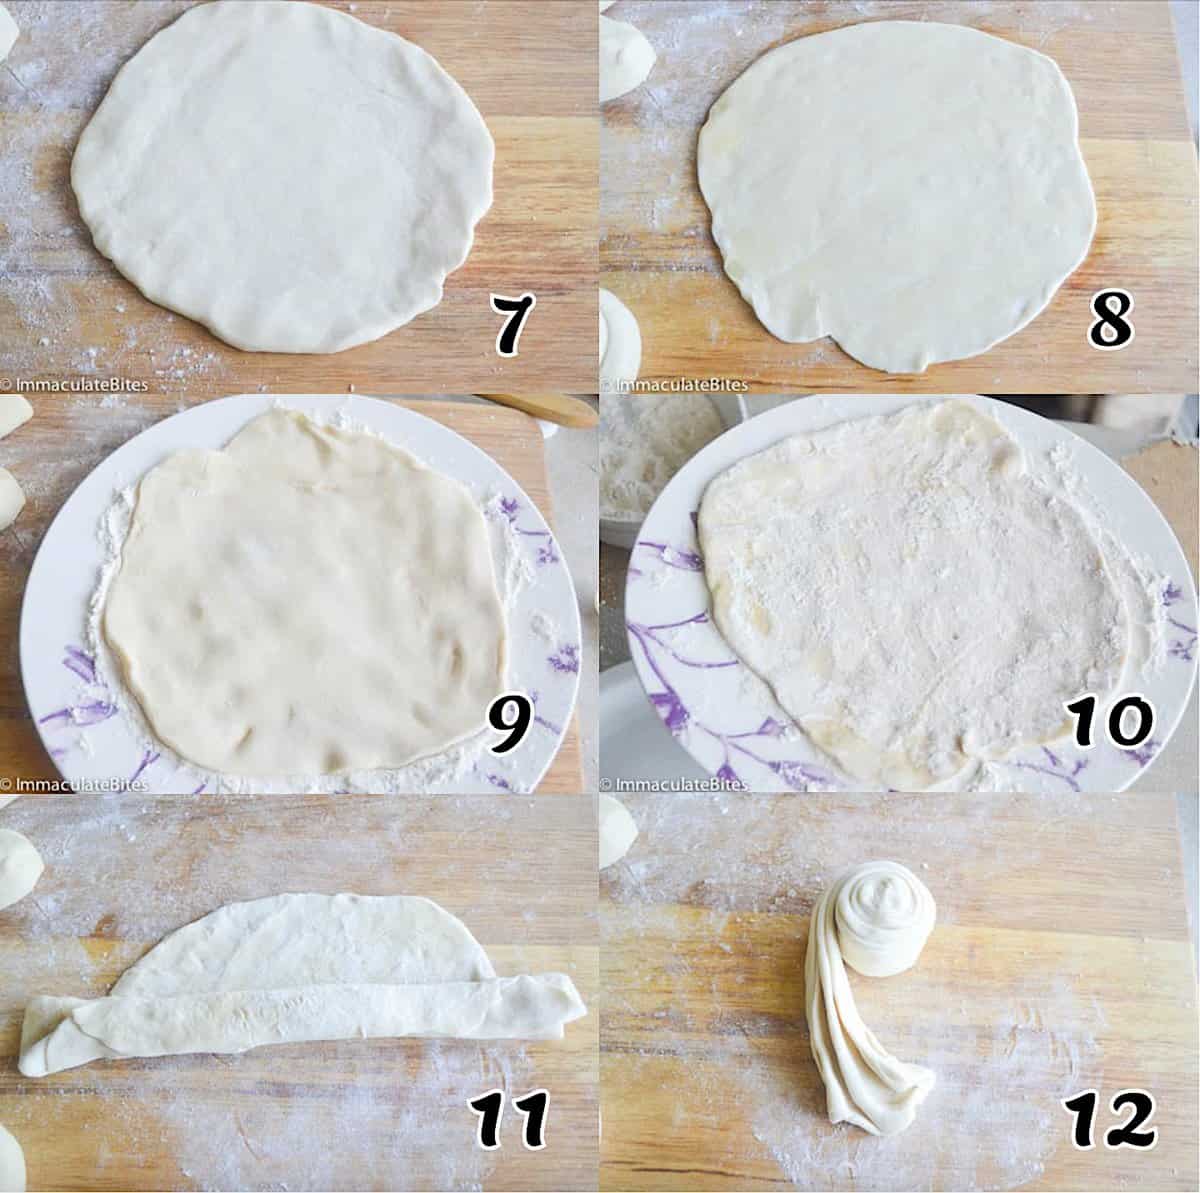
- Roll the balls into circles and dust them with flour so they don’t stick together. Fold them like a fan, then coil them.
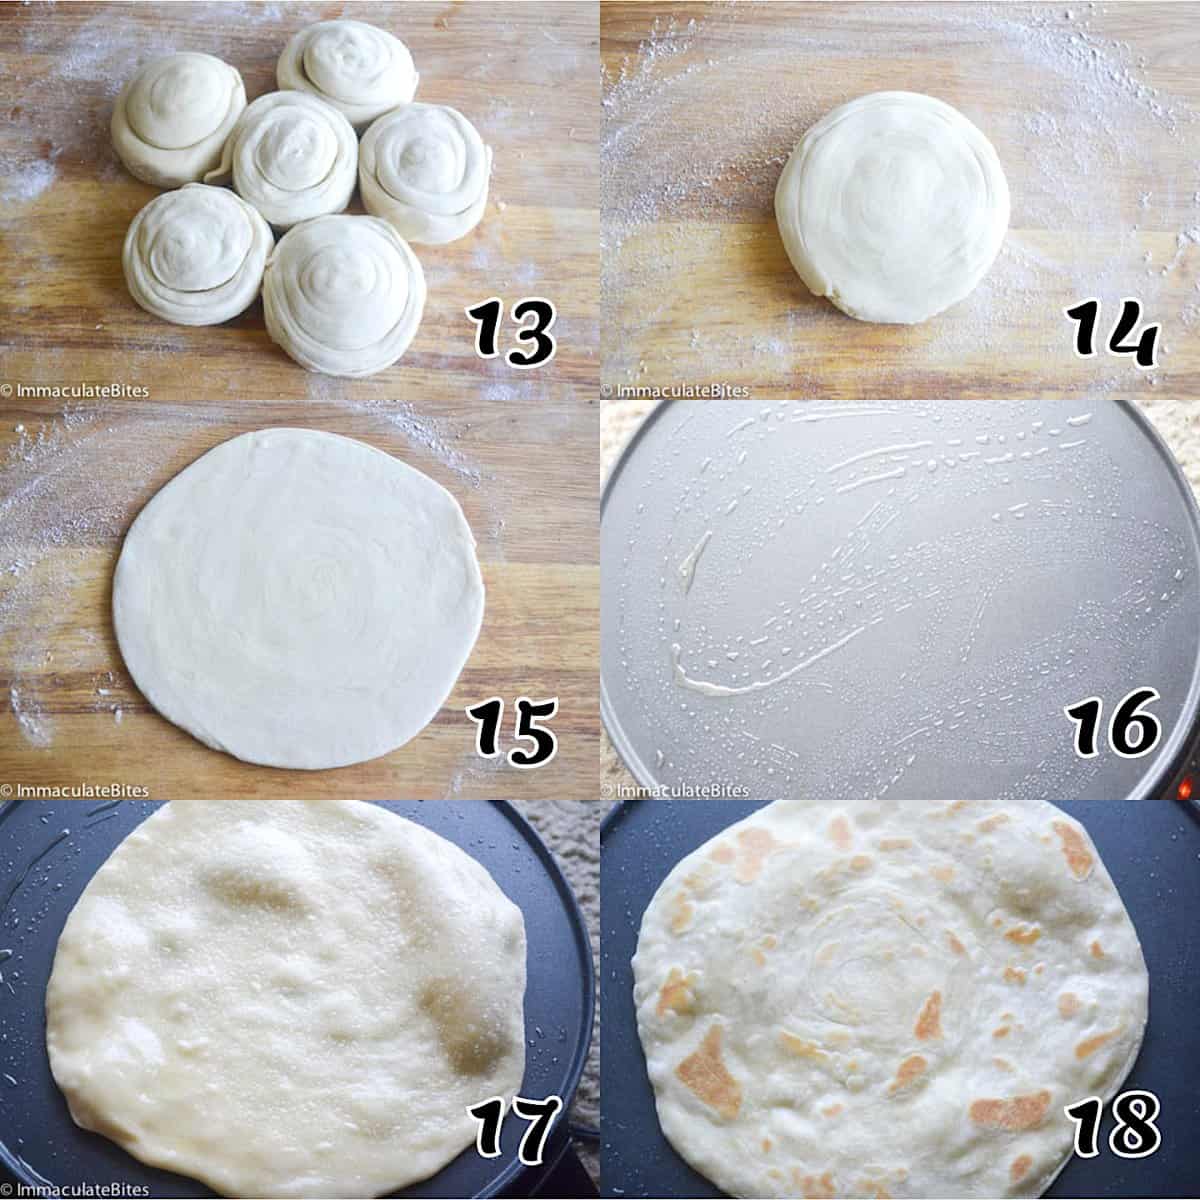
- Roll the coiled balls back into a circle and cook on an oiled griddle.
Recipe Twists and Tips
- You can add grated veggies, such as carrots, squash, and potatoes, to the dough, like in Kenyan chapatis or vegetable omelets in Uganda.
- Use a 50/50 water-to-milk ratio to make softer flatbreads.
- A non-stick pan helps prevent the bread from sticking and burning.
Make-Ahead and Storage Instructions
You can make the dough ahead, transfer it to a covered bowl, and refrigerate it for 24 hours. Allow it to rest at room temperature for an hour before rolling it into individual chapatis.
Or you can freeze the raw dough or chapatis for three months. Allow the dough to thaw and come to room temperature before cooking.
Flatbread keeps in the fridge for up to a week or in the freezer for 3-4 months. Heat them in a hot skillet for 30 seconds or wrap them in a paper towel and zap them in the microwave on medium-low for a few seconds, but the skillet is better.
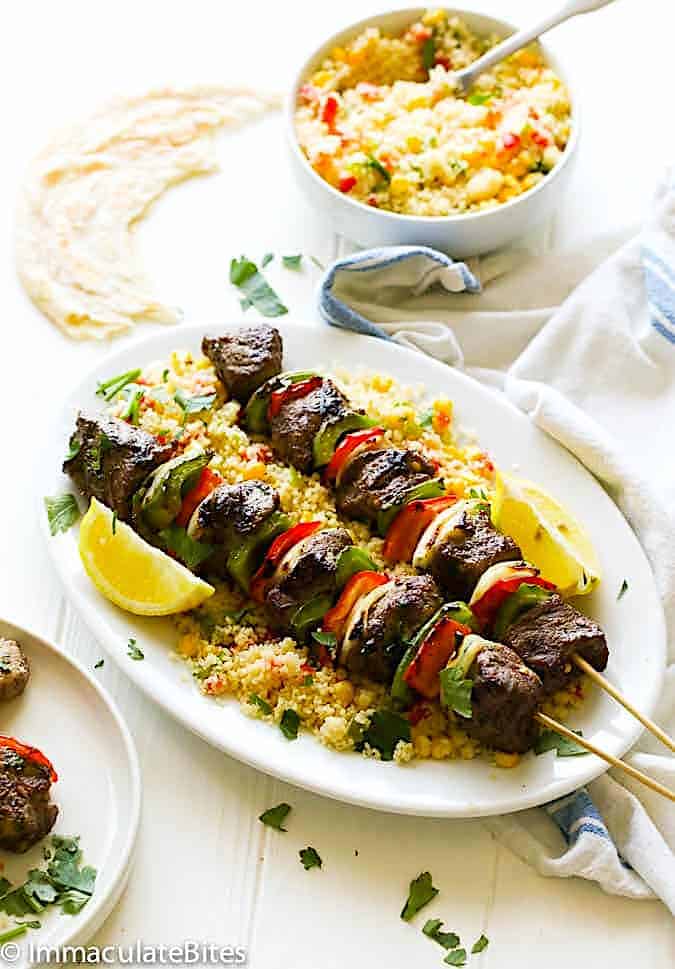
Mouthwatering Recipes You Can Use With Chapati
Dip chapati in curry sauce or make a steak wrap sandwich for more deliciousness. Curry channa and aloo, African peanut stew, ground beef curry, Jamaican curry goat, and crockpot beef tips & rice are great choices.
More Comforting Flatbread Recipes to Try
Watch How to Make It
[adthrive-in-post-video-player video-id=”1m5Y3sEi” upload-date=”2019-04-01T06:51:26.000Z” name=”East African Chapati” description=”East African Chapati- Easy to make chapati that are Flaky, layered and Delicious. Made with a few simple ingredients.”]
This blog post was originally published in June 2014 and has been updated with additional tips, new photos, and a video.

Chapati Recipe
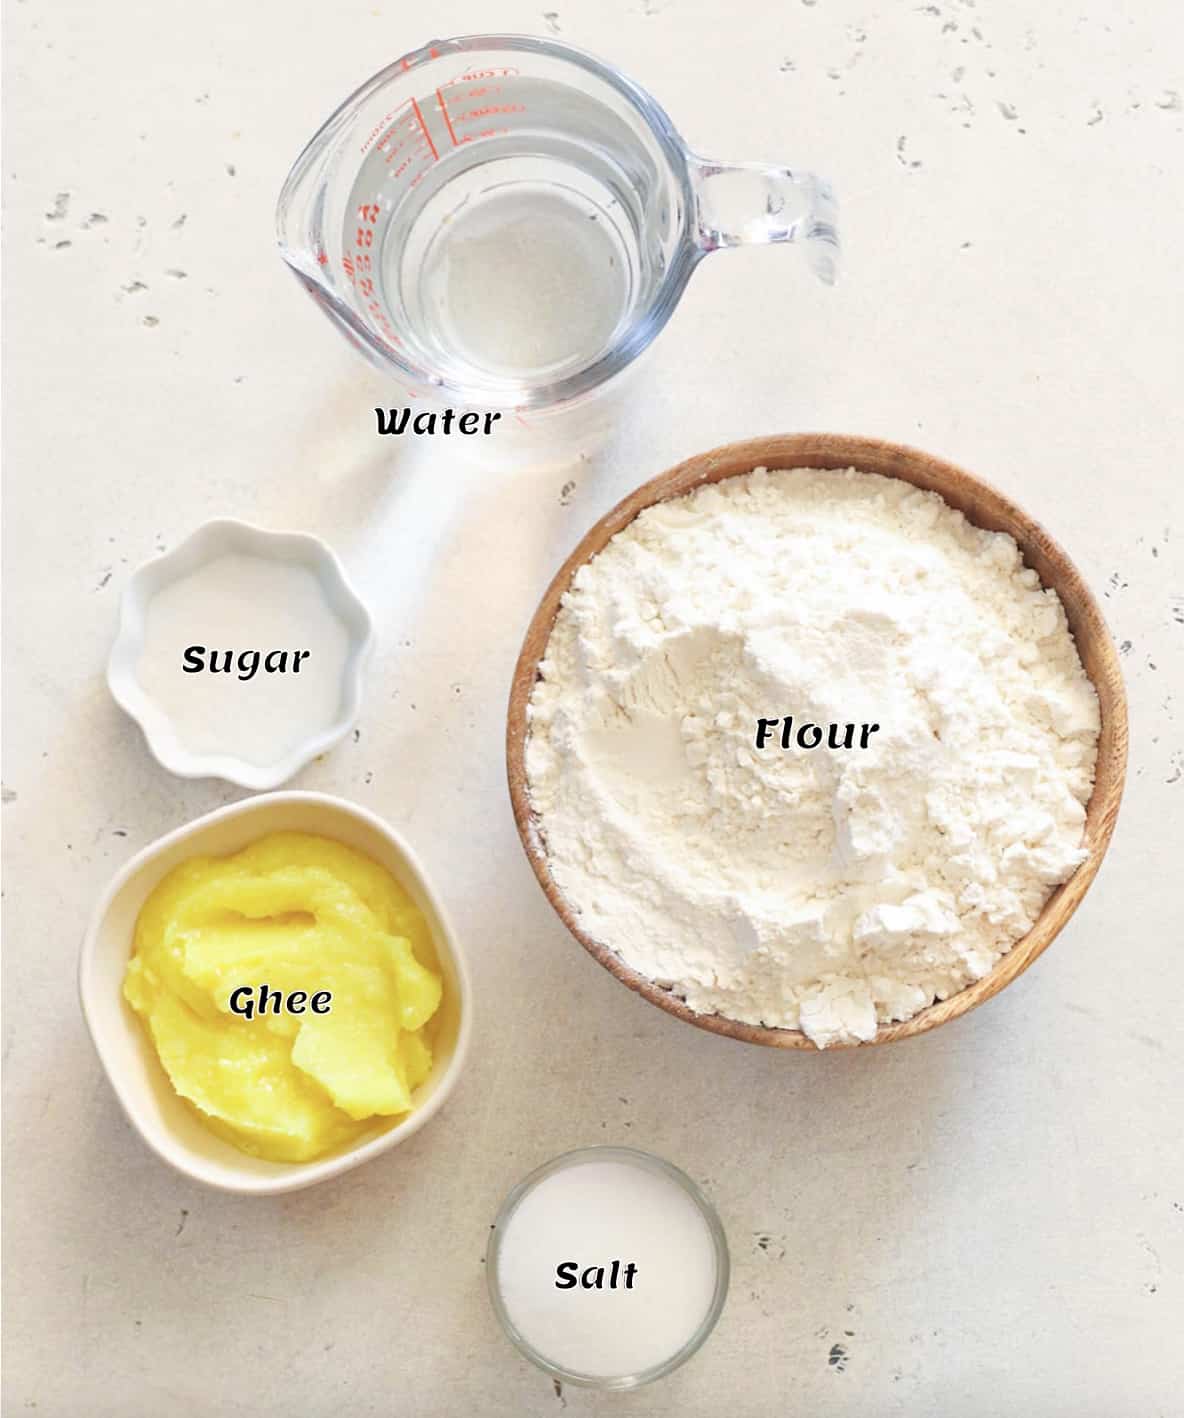
Ingredients
- 3 cups (360g) all-purpose flour
- 1 teaspoon (4g) sugar
- 1½ teaspoons (7-8g) salt
- 3 tablespoons (42g) ghee (clarified butter or oil)
- 1¼ cup (295ml) warm water
Instructions
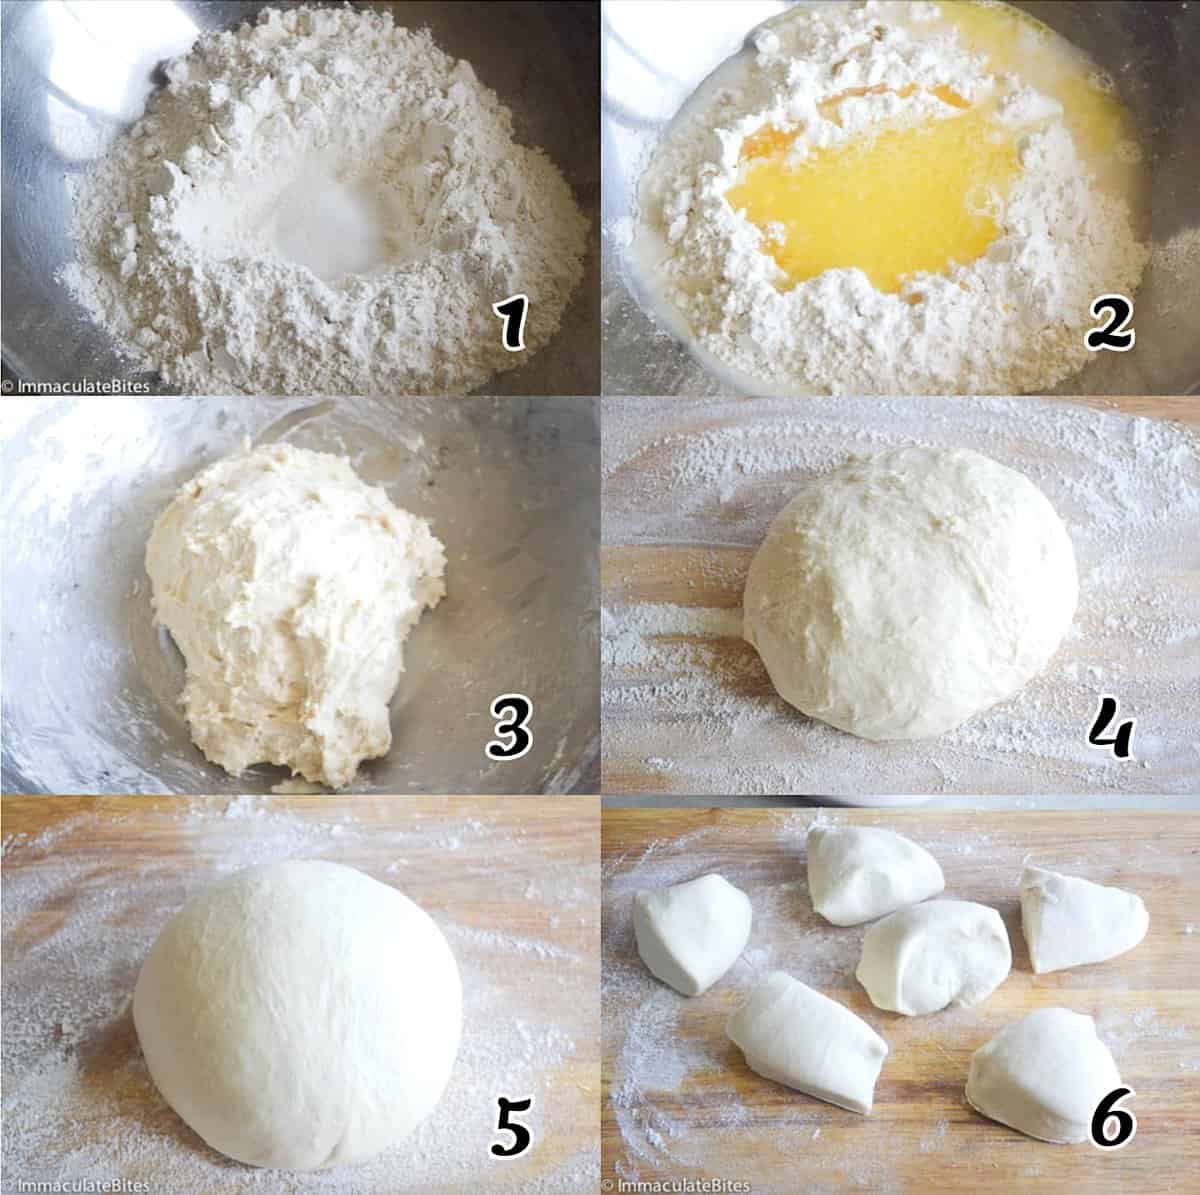
- In a large bowl, add flour and make a well, then add sugar and salt, followed by water and ghee or oil.
- Knead to form a soft and sticky dough.
- Place dough on a heavily floured board and knead for 8-14 minutes. Continue to flour dough as needed to facilitate kneading. Be careful not to overdo it. The dough should be soft, elastic, and smooth.
- Divide dough into 6 or 8 pieces according to preference and let it rest. Resting helps to relax the gluten and makes it not only easier to work with but also produces tender chapati.
- Using a rolling pin, roll out the dough balls into a circle. They don't have to be perfect.
- At this stage, you may cook them. However, if you want chapatis with layers, follow the next steps.
- Lightly oil chapati dough with ghee. Be gentle.
- Then place the dough on a heavily floured plate, and press the dough down.
- Turn it over and press down again – lightly shake off excess flour.
- Shape dough like you would shape a paper fan – starting at one end and folding all the way to the opposite end.
- Then coil it up – like in the picture.
- When all the dough circles have been coiled, cover them with a damp cloth and let them rest for 20 minutes.
- Gently flatten each coiled ball and roll it out. Begin rolling from the center, working outwards.
- Rotate the dough out each time you roll it. That helps to make a perfect circle. Make sure they are not rolled out too thin. Chapatis are not meant to be thin – a ¼-inch thickness is good.
- Oil the pan. Then place the chapati on it. I used a crepe pan, but a skillet works just as well.
- Heavily oil the other side of the dough, making sure you oil the edges too.
- Cook for 2-3 minutes, rotating as needed until golden brown. Serve warm.
Tips & Notes:
- The right amount of kneading is crucial. Gluten won’t develop well without it, changing the texture. Also, oil makes the chapati soft and prevents it from drying out.
- Lukewarm water creates a smoother, more supple dough, but remember to add it gradually so the dough doesn’t get too wet.
- Resting time is also essential since it makes the dough easier to roll without breaking apart.
- Please remember that the nutritional information is a rough estimate and can vary significantly based on the products used in the recipe.

Heat setting? I’m sure I can start with medium on my gas cooker, and adjust quickly enough… just curious if it matters to go faster/hotter or let them cook through more slowly, given their thickness? Thanks!
Hi Kenny,
I would let them cook through, slowly. I usually my chapatis on medium heat.
Thank you for the recipe. Its quite easy to follow. Now my whole family is enjoying chapati, whenever we want, because now mommy is so good in making it.
High Five!!!
Are the calories for the whole recipe or for the individual pieces?
That is approximately for every 2 pieces. Please keep in mind that nutritional information is a rough estimate and can vary greatly based on products used.
Hello Imma!
Thank you so much for sharing this recipe – I tried it today and they turned out great!
I have chapati flour, do I have to mix it with all purpose flour?
Hi. I haven’t tried working on this recipe with chapati flour though or mixing it with AP flour. So I can’t give you a definite answer for that however I’ve seen some online who mixes both types of flour.
OMG!!! These were Amazing!! I used olive oil instead and very little of it and they were still Soft(almost fluffy ) and Yummy am keeping this recipe !!Thank You !!
So tasty! This is the first flatbread recipe without yeast I’ve made that turned out delicious. I was beginning to think I couldn’t make yummy homemade bread without yeast! Thanks so much for this recipe. The layering technique is definitely a winner.
Thanks for taking the time to let me know, Maribeth! =)
Nice recipe.
I’m so so happy to have come across this recipe. I don’t make chapatis often because they tend to hit and miss, with them more often than not becoming biscuits. But this recipe quantifies all the ingredients and worked perfectly!!! Highly highly recommend it. They were perfectly layered, soft with the crunch on the side – Delish!!!
Thanks so much Imma! I’ll definitely look for and try more of your recipes!
That is so great Priscilla! I’m thrilled to read that, and thank you for sharing—you this with us. It makes me so happy!!!
best recipe ever. my chapatis came out perfect. my family really enjoyed them.
Delicious! I made the quick version without the layers – as I was in a hurry – but next time I will definitely try the other method. I love how easy this is to make; I know it will become a staple in our house.
Great success here. My first time making chapatis. Being lazy, I used a bread machine to kneed dough and it came out just right consistency…soft on the point of being sticky but easy to manage. Loved making the fan shape and coiling it up. That made it much easier to get an even round shape for the final chapati. Saved half the coils to roll out tomorrow for curry again. Thanks for the recipe. It made six.
Thanks for sharing your thoughts, Angela. Glad it turned out great for you. Have a lovely day!
A recipe we got from our cook in Uganda for her Chapatis called for adding a half cup of finely chopped onion to the mix. Is this normal for Uganda, or just possibly her twist on the recipe? Hers were very good, I just hadn’t seen that in other recipes like this one.
That sounds interesting! It might be her own twist to add more flavor and texture to the recipe. I might have to try that some other time. 🙂
Looks like You guys combined chapathi and Lachha paratha technic (there are few ways we coil the dough) and called it African chapati. . Anyway, came to check out hummingbird cake and started to look thru the site. Finding some childhood favorite like baji. Coconut rice pancake is another childhood favorite after school snack. My grandma used to make it in Appe pan. Going to try some of your desserts.
Can’t wait to hear how it works out for you.Thanks for taking the time to share your thoughts.
We were making chapatis for a school project. These turned out so good now my 11 year old and I want to make a whole meal!
Awesome!Thanks for the feedback.
Wow! Just Wow!
Thanks for sharing this recipe! All the instructions are clear and believe me, it turned out really well!! I couldn’t stop admiring my creation hahaha! At first I was so pessimistic because the flour is not white (I used atta flour, thats the only flour I could get here in South Sudan) and I have no idea of how does the ‘overdo-ing a dough’ looks like. I just put on timer on 12 minutes and kneaded the dough. But still it turned out perfect.
Here I always buy fresh chapati from the market (which was ok) but my chapati is different. It was soft, flaky, and I like the effect on how the folding-things made. And it went well with stew, egg, even condensed milk and cheese! I love it!
Virtual High five Girl! You did it ! So happy to hear it worked out SOOOO well for you. Thanks for taking the time to share your thoughts with us.
Yum!! My family enjoys these Chapati for breakfast, lunch and dinner!! Whole wheat Chapati, hot chocolate and egg whites, Chapati with beans, and franks, burritos…delicous!
OH YESS! It’s great with EVERYTHING. Me love it too!
Thank you for the fantastic recipe. Our Kenian guests were delighted and I was reminded of my last visit in Kenia.
My pleasure! Glad to hear it worked out well for you.
It is awesome!!! I love it and all my family members also. Thanks a lot. Now It will try your samossa recipe
Hi Tahina! Glad to hear it worked out well for you and your family. Thanks for the feedback!
I’m making them now and have to ask, are you meant to add water OR ghee? I added both, and the dough is way to sticky, even after adding an extra cup of flour. Thinking I should start over. 🙁
You add both together(the ghee and water). It shouldn’t be that sticky. I would suggest you start over and double check measurements.
This recipe was just wonderful! Thank you very much.
Awesome! Thanks for the feedback!